 Pin it
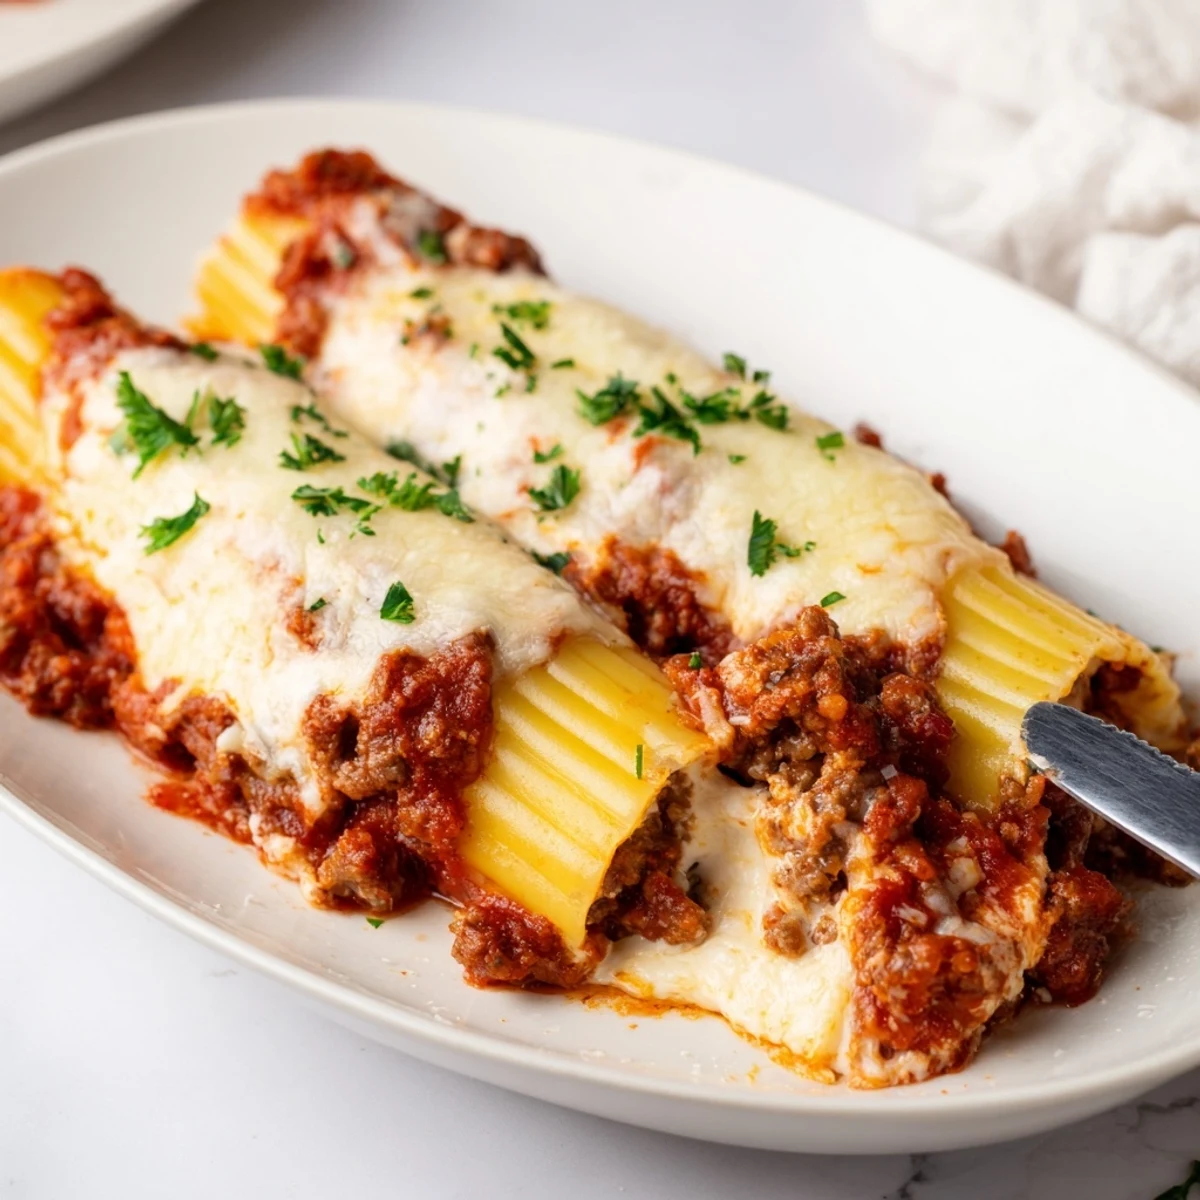
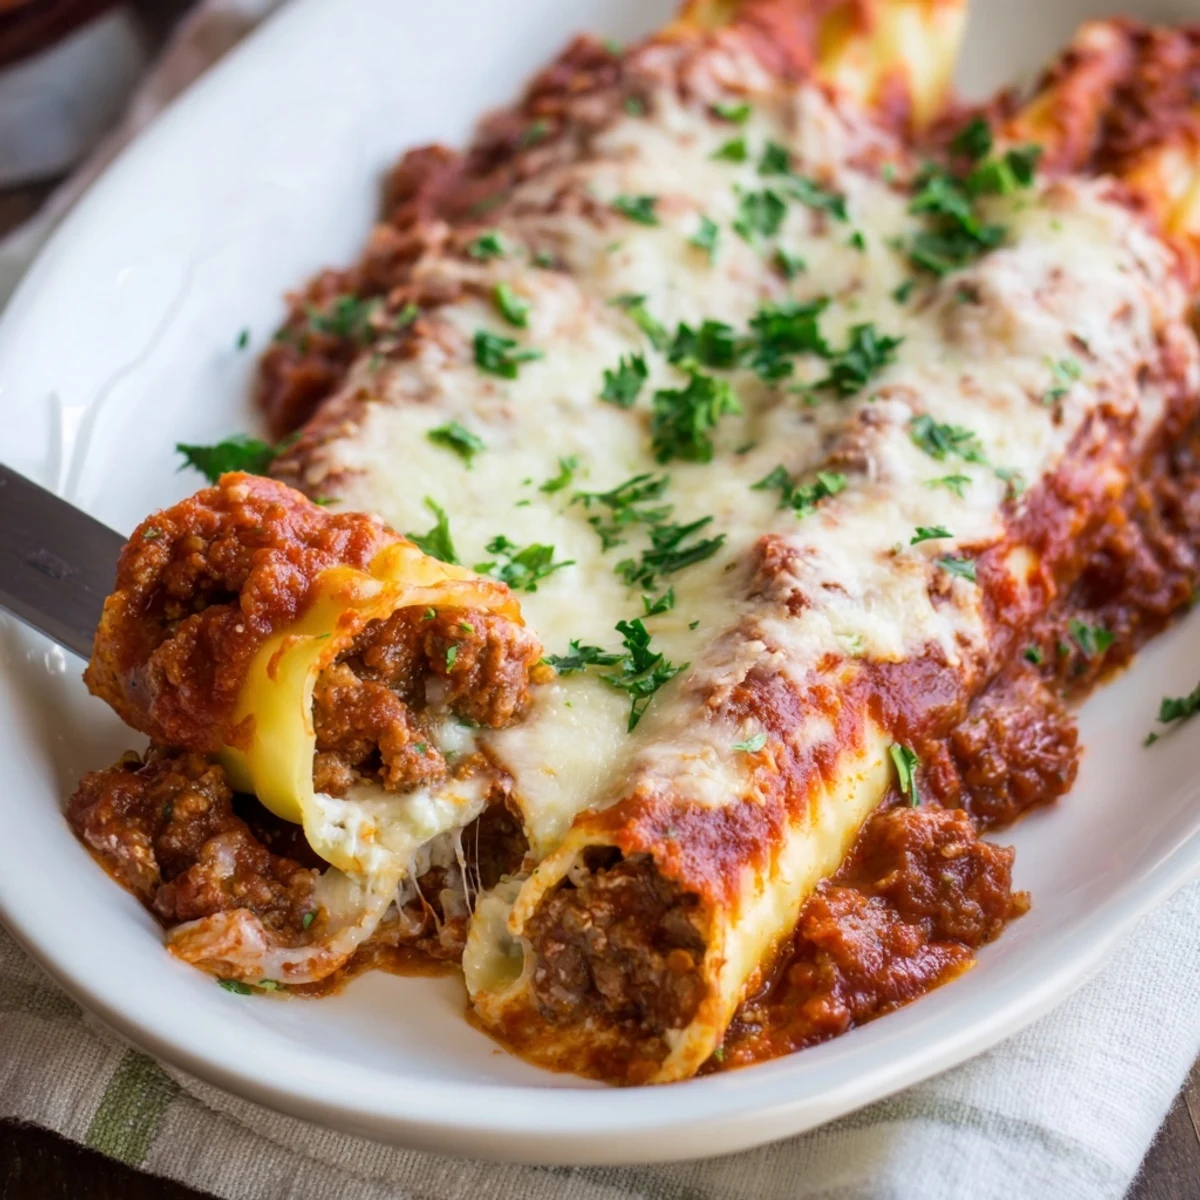
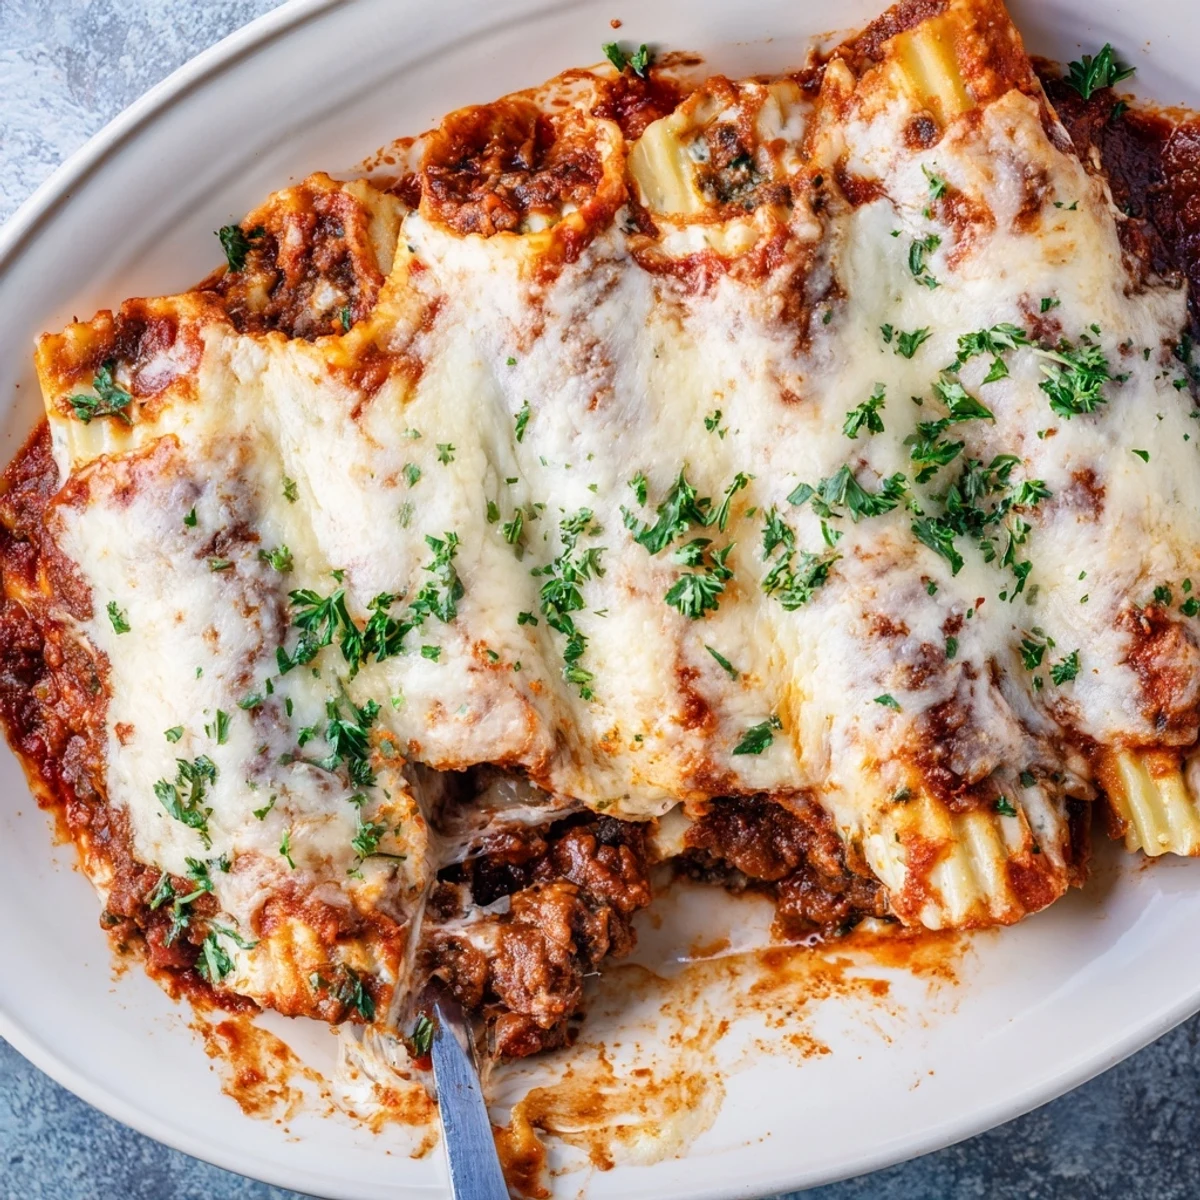
 Creamy ricotta and three cheeses fill tender manicotti tubes, which are nestled in a robust, homemade meat sauce and baked until golden and bubbly. This hearty Italian classic combines the perfect balance of savory ground beef, aromatic herbs, and velvety melted cheeses for a satisfying meal that brings the family together.
The first time I made manicotti, I was hosting a Sunday dinner for my in laws, and my hands were literally shaking as I filled those delicate pasta tubes. I had watched my neighbor Mrs. Rosetti do this a hundred times, making it look effortless, but there I was with ricotta smeared across my cheek and flour dusting my apron like snow. When that bubbling dish emerged from the oven, golden and fragrant, I realized something profound about Italian cooking: it is not about perfection, it is about showing up with love.
Last winter, during that terrible week when we were all snowed in, my teenage daughter actually asked me to teach her how to make this recipe. We spent hours in the kitchen, her carefully piping cheese into shells while I stirred sauce, talking about everything and nothing at all. Now, whenever I smell tomato sauce simmering with basil and oregano, I am right back in that cozy kitchen with snow piling up outside and something beautiful bubbling away inside.
Ingredients
- 1 tbsp olive oil: Creates the foundation for your sauce, lending a subtle fruitiness that balances the acidity of tomatoes
- 1 medium onion, finely chopped: Sweetens as it cooks, providing that essential aromatic base that makes kitchens smell like home
- 2 garlic cloves, minced: Add these after your onions soften so they do not burn and turn bitter
- 1 lb (450 g) ground beef: Choose beef with a bit of fat content for better flavor, though I have made this with turkey when watching cholesterol
- 1 (24 oz / 680 g) can crushed tomatoes: The backbone of your sauce, giving body and that rustic texture we love
- 1 (15 oz / 425 g) can tomato sauce: Adds smoothness and helps bind everything together beautifully
- 2 tbsp tomato paste: Concentrated tomato flavor that deepens the sauce and gives it that restaurant quality richness
- 1 tsp dried basil: Sweet and aromatic, this is the gentle herb that makes everything taste Italian
- 1 tsp dried oregano: Brings that slightly earthy, pungent note that cuts through the richness of cheese and meat
- ½ tsp red pepper flakes: Just a whisper of heat that wakes up your palate without overwhelming the dish
- 1 tsp sugar: My grandmother insisted on this secret ingredient to balance the acidity of canned tomatoes
- Salt & black pepper, to taste: Season gradually as you cook, tasting as you go to build layers of flavor
- 1 (15 oz / 425 g) container ricotta cheese: Whole milk ricotta creates the dreamiest filling, though part skim works in a pinch
- 1½ cups shredded mozzarella cheese: Use low moisture mozzarella for the filling to avoid excess moisture in your shells
- ¾ cup grated Parmesan cheese: freshly grated makes an enormous difference, adding that salty, nutty depth
- 1 large egg: The binder that keeps your cheese filling from becoming a puddle in the oven
- 2 tbsp chopped fresh parsley: Fresh herbs brighten the heavy cheese filling, though dried parsley works when that is what you have
- ¼ tsp ground nutmeg: The secret weapon in cheese fillings, adding warmth and complexity nobody can quite identify
- 12 manicotti shells (uncooked): Look for sturdy tubes without cracks, as broken shells make filling frustrating
- 1 cup shredded mozzarella cheese: This final blanket of cheese creates that irresistible golden crust we all fight over
- ½ cup grated Parmesan cheese: Extra Parmesan on top adds a salty, savory punch and beautiful browning
Instructions
- Preheat your oven and prepare the baking dish:
- Set your oven to 375°F (190°C) and give a 9×13 inch baking dish a light coating of oil or cooking spray so nothing sticks
- Build your sauce foundation:
- Heat that tablespoon of olive oil in a large skillet over medium heat, then add your chopped onion and cook for about 4 minutes until it turns translucent and smells sweet
- Add the aromatic garlic:
- Throw in your minced garlic and let it cook for just one minute, watching carefully so it does not brown or turn bitter
- Brown the beef:
- Add the ground beef and break it apart with your spoon, letting it cook until completely browned and no pink remains, then drain off the excess fat
- Create the meat sauce:
- Pour in both cans of tomatoes, the tomato paste, and all your dried herbs and seasonings, then let everything simmer uncovered for 20 minutes while you prepare the filling
- Cook the pasta shells:
- Boil the manicotti for just 1 to 2 minutes less than the package directs, then drain and rinse with cold water so they stop cooking and are easier to handle
- Mix the cheese filling:
- Combine the ricotta, mozzarella, Parmesan, egg, parsley, nutmeg, salt, and pepper in a bowl until smooth and creamy
- Fill the manicotti tubes:
- Use a piping bag or a plastic bag with the corner snipped off to pipe cheese into each shell from both ends, being careful not to split them
- Start layering the dish:
- Spread about one cup of your meat sauce across the bottom of your prepared baking dish, then arrange filled manicotti in a single layer
- Complete the assembly:
- Spoon remaining sauce evenly over all the manicotti, then sprinkle with the final cup of mozzarella and half cup of Parmesan
- Bake until bubbly:
- Cover tightly with foil and bake for 25 minutes, then uncover and continue baking for another 15 minutes until the cheese is golden and bubbling
- Let it rest before serving:
- Wait 10 minutes before serving so the sauce sets and each portion holds its shape on the plate
 Pin it
 My father, who claimed to hate Italian food for forty years, once cleaned his plate after tasting this manicotti at our house. He sat in silence for a full minute before asking if there were seconds, and I knew right then that this recipe had earned its permanent place in our family rotation.
Making Ahead Like A Pro
I have learned through trial and error that manicotti actually tastes better when made ahead, giving the flavors time to marry and develop that impossible depth. You can assemble the entire dish up to 24 hours in advance, keep it covered in the refrigerator, then bake it straight from the cold, just adding about 10 minutes to the covered baking time. This has saved me more times than I can count when hosting dinner parties or feeding a crowd on busy holidays.
Freezing For Later
One manicotti recipe always makes enough for two dinners in our house, so I have become an expert at freezing the second portion for those nights when cooking feels impossible. Wrap the assembled but unbaked dish tightly in plastic, then foil, and freeze for up to 3 months. Thaw overnight in the refrigerator before baking, or add about 30 minutes to your baking time if cooking from frozen.
Serving Suggestions
A crisp green salad with bright vinaigrette cuts through the richness of this dish, and garlic bread is practically mandatory for soaking up that extra sauce. I also love setting out small bowls of red pepper flakes and extra Parmesan at the table so everyone can customize their portion.
- Let the dish rest those full 10 minutes or you will end up with a mess on the plate instead of beautiful portions
- If you cannot find manicotti shells, jumbo pasta shells work just as well and are sometimes easier to fill
- This recipe doubles beautifully for large gatherings, just use two baking dishes
 Pin it
 There is something profoundly satisfying about pulling this golden, bubbling dish from the oven and watching people lean in a little closer as you carry it to the table. Hope it becomes one of your Sunday traditions too.
Recipe Q&A Section
- → Can I prepare manicotti ahead of time?
-
Yes, assemble the entire dish up to 24 hours in advance, cover tightly, and refrigerate. You may need to add 5-10 minutes to the baking time if baking cold from the refrigerator.
- → What can I use instead of ground beef?
-
Ground turkey, Italian sausage, or a plant-based ground meat alternative work beautifully. For vegetarians, sautéed mushrooms or spinach add excellent texture and flavor to the sauce.
- → How do I prevent manicotti shells from tearing?
-
Cook the shells 1-2 minutes less than package directions so they remain firm enough to handle. Rinse with cold water immediately to stop cooking and handle gently when filling.
- → Can I freeze assembled manicotti?
-
Absolutely. Assemble in a freezer-safe dish, wrap tightly with plastic and foil, and freeze for up to 3 months. Thaw overnight in the refrigerator before baking as directed.
- → What sides pair well with this dish?
-
A crisp Italian salad with vinaigrette, garlic bread or focaccia, and roasted vegetables like asparagus or green beans complement perfectly. A medium-bodied red wine such as Chianti elevates the experience.
- → Why is nutmeg added to the cheese filling?
-
A pinch of nutmeg is a classic Italian addition to ricotta fillings. It adds subtle warmth and depth that enhances the cheese flavors without overpowering the dish.
