 Pin it
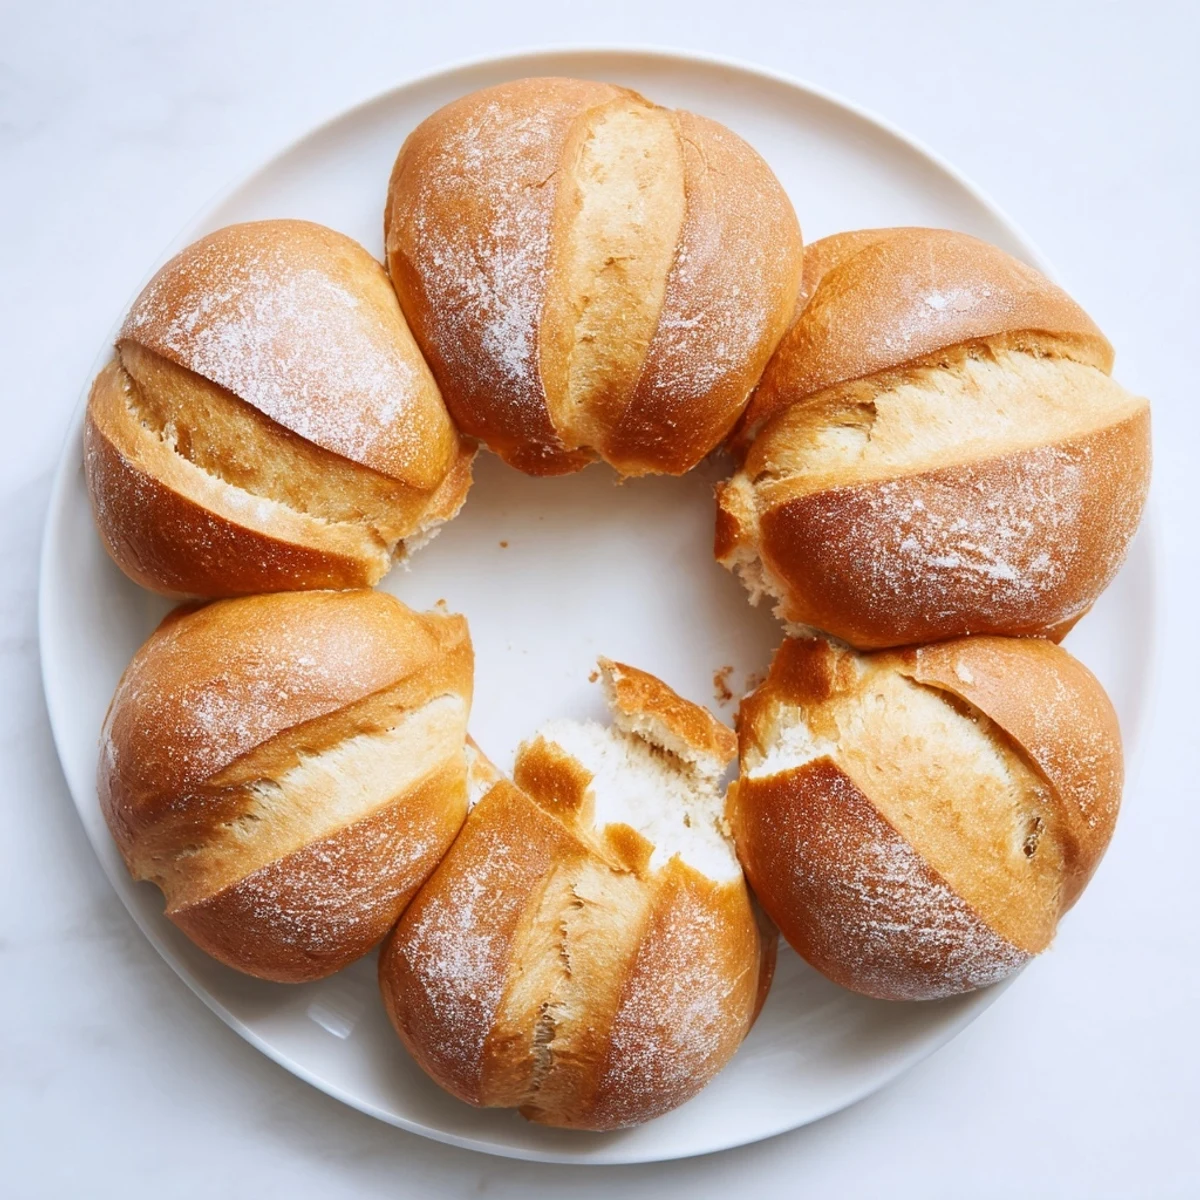
 Bake golden French bread rolls with a crispy exterior and tender inside. These classic rolls achieve their signature crust through steam baking, while the interior remains soft and perfect for slathering with butter.
The process involves a simple yeast dough that rises twice, developing flavor and texture. After shaping, the rolls bake at high heat with a water tray creating steam for that authentic bakery-style crunch.
Ready in about 2 hours including rising time, these versatile rolls complement any meal. Serve them warm alongside soups, use for sandwiches, or enjoy simply with cheese.
The steam from these rolls hit my face before anything else. I had wedged the oven door open too early, caught up in watching them turn golden, and that first wave of bakery smell filled the entire apartment. My roommate appeared in the kitchen doorway within thirty seconds, following her nose like a cartoon character. We ended up eating three rolls right there, standing over the cooling rack, burning our fingers on the crust and not caring one bit.
My grandmother always said you could tell a good bread by how much noise it makes when you tear it open. These rolls crackle and sing, that thin crust giving way to the softest interior. I served them at a dinner party once, and my friend actually paused mid conversation to ask what bakery I had visited. The look on her face when I told her they came out of my oven was absolutely worth the two hour wait.
Ingredients
- Bread flour: The higher protein content here creates that signature chew and structure you cannot get with all purpose flour alone
- Lukewarm water: Temperature matters too cold and the yeast will sleep, too hot and you will kill it before it can work its magic
- Active dry yeast: This is the engine that makes everything happen, so do not rush the foaming step or you will end up with dense disappointments
- Salt: More than just seasoning, it strengthens the gluten structure and keeps the yeast from going too wild
- Sugar: Just enough to wake up the yeast and help the crust develop that beautiful golden color
Instructions
- Wake up the yeast:
- Stir together your lukewarm water and sugar, then sprinkle the yeast on top and walk away for at least five minutes. You want to see a layer of foam forming on the surface like a tiny science experiment, proving those little organisms are alive and ready to work.
- Build the dough:
- Pour in your flour and salt, then mix until everything comes together into a shaggy mass. Turn it out onto a clean surface and knead for the full ten minutes, pushing with the heel of your hand and folding back over itself until the dough feels smooth and springs back when you poke it.
- Let it rise:
- Place your dough in a lightly oiled bowl, cover it with a damp cloth, and find the warmest corner of your kitchen. Leave it alone for a full hour until it has puffed up to double its original size, pressing two fingers into the dough to check that the indentation stays put.
- Shape the rolls:
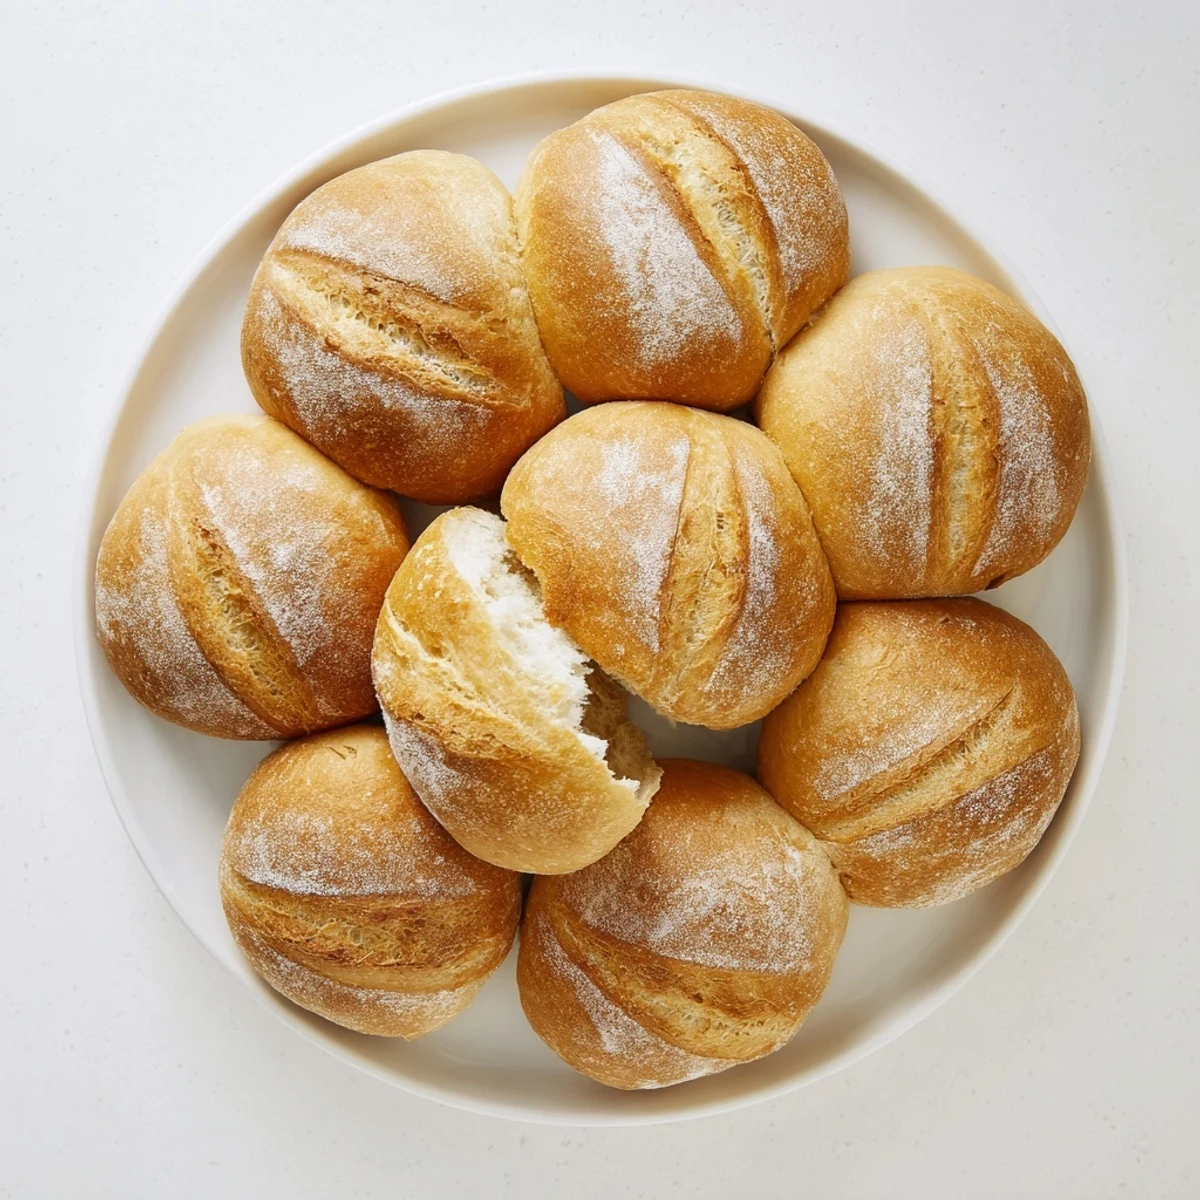
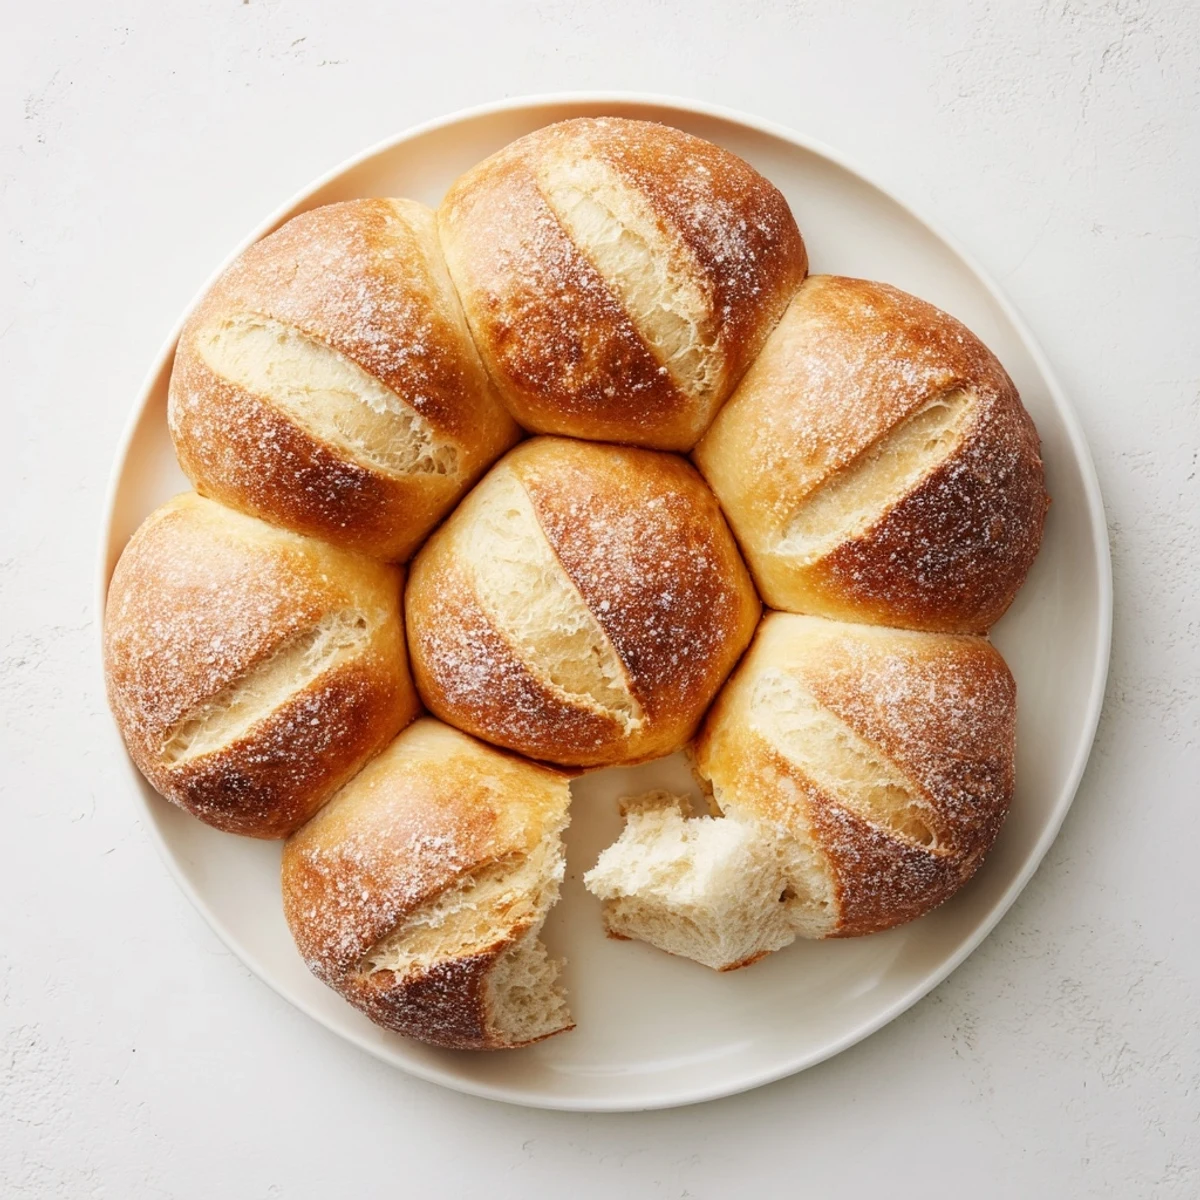
- Punch down the dough gently to release the air, then divide it into eight equal portions. Shape each piece into a smooth ball by tucking the edges underneath, then place them on a parchment lined baking sheet with enough room to expand without touching.
- Second rise and prepare:
- Cover the rolls with a clean towel and let them puff up again for thirty to forty minutes while you preheat your oven to 450°F. Put an empty tray on the bottom rack now, because you will need it for steam later.
- Add professional touches:
- Dust the tops of each roll lightly with flour, then use a very sharp knife to make a quick slash across the surface. This gives the dough a place to expand in the oven and creates that classic bakery look.
- Bake with steam:
- Pour a cup of hot water into that empty tray on the bottom rack, then immediately slide your rolls onto the middle rack. The steam creates a crispy crust, so shut the door quickly and bake for twenty to twenty five minutes until deep golden brown.
- Cool completely:
- Let the rolls rest on a wire rack for at least fifteen minutes before tearing into them. The crust needs this time to set properly and the inside finishes cooking through as it cools.
 Pin it
 These rolls became my go to contribution to family gatherings after the year I brought store bought bread and my dad pretended not to notice. Now they actually request them specifically, and I have caught my brother sneaking one before dinner even starts. Something about homemade bread makes people feel taken care of in a way that almost nothing else can.
Getting That Perfect Crust
The secret restaurant technique here is creating steam in your oven, which keeps the crust soft initially allowing the bread to expand fully before hardening into that delicious shell. I experimented for months before discovering the water tray trick, and the difference was night and day. The rolls come out looking and tasting like they were baked in a professional stone oven.
Making Them Your Own
Sometimes I brush the tops with melted butter as soon as they come out for a softer crust, or sprinkle everything bagel seasoning over them before that second rise. You can replace some of the water with milk for a sweeter, more tender crumb. I have even added rosemary and garlic to the dough for an herbed variation that disappeared faster than the plain ones.
Storage And Serving Suggestions
These rolls are best eaten the same day they are baked, because that crisp crust starts to soften overnight and they will never be quite as perfect as that first day. I keep them on the counter uncovered if we are eating them within a few hours, but wrap them in foil if they need to sit longer. You can refresh day old rolls in a 350°F oven for five minutes.
- Slice them while still slightly warm for sandwiches that will make you rethink lunch forever
- Freeze extras immediately after cooling and reheat in the oven at 375°F for ten minutes
- Leftover rolls make incredible croutons when cubed and toasted with olive oil
 Pin it
 There is something deeply satisfying about pulling a tray of golden rolls out of your own oven, the kitchen still warm and filled with that unmistakable fresh bread smell. These rolls might take some time, but the first bite of that crackling crust makes every minute worth it.
Recipe Q&A Section
- → What makes French bread rolls crusty?
-
The high oven temperature combined with steam creates a crispy golden crust. Placing a water tray on the bottom rack generates steam during baking, which helps develop that signature crunchy exterior while keeping the inside tender.
- → How do I know when the dough has risen enough?
-
The dough is ready when it has doubled in size during the first rise. You can test it by gently pressing two fingers into the dough—if the indentation remains, it has risen sufficiently. The second rise takes 30-40 minutes until the rolls look puffy.
- → Can I make these rolls ahead of time?
-
Yes, you can prepare the dough and shape the rolls, then refrigerate them before the final rise. Let them come to room temperature and rise for about 30 minutes before baking. Already baked rolls freeze well for up to 3 months.
- → Why is steam important when baking bread?
-
Steam keeps the outer dough flexible longer, allowing the rolls to expand fully in the oven. This creates a thinner, crispier crust. Without steam, the crust forms too early and becomes thick and hard rather than crispy and delicate.
- → What can I add to customize these rolls?
-
Try adding herbs like rosemary or thyme to the dough, incorporate sesame or poppy seeds on top before baking, or brush with garlic butter after baking. You can also replace some water with milk for richer flavor and softer texture.
- → Why do I need to slash the tops before baking?
-
Slashing the dough with a sharp knife allows the rolls to expand properly in the oven without bursting unevenly. It also creates those classic decorative patterns on top and helps the crust develop a better texture.
