 Pin it
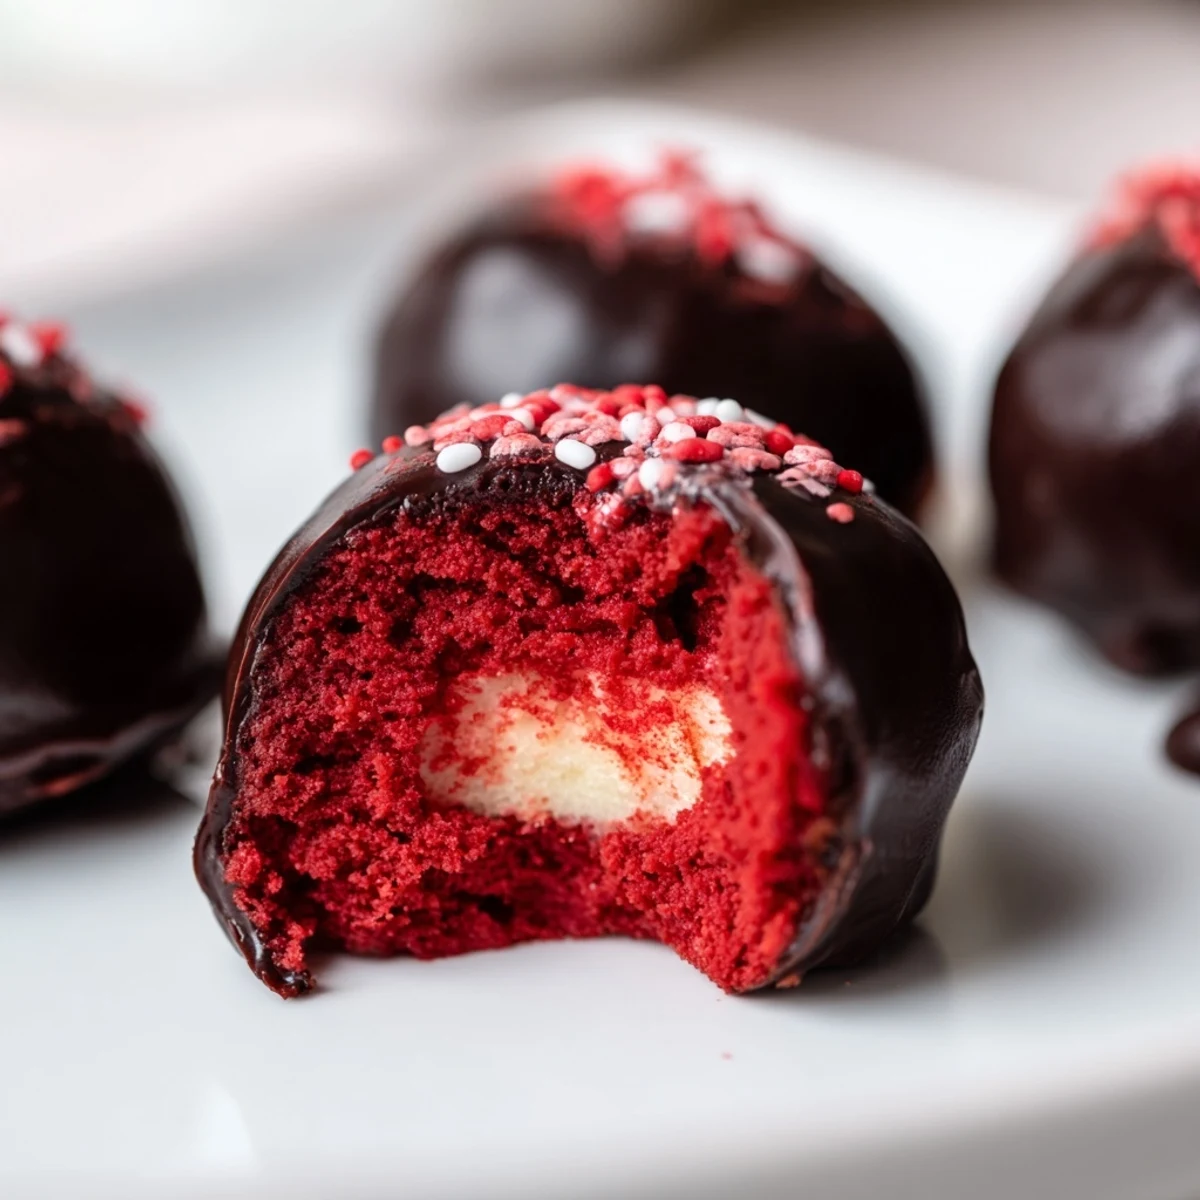
 These decadent red velvet cheesecake balls combine moist red velvet cake with creamy cheesecake filling, all coated in a luscious chocolate shell. The perfect bite-sized dessert for parties, holidays, or whenever you crave something sweet and indulgent. Each ball features the classic red velvet flavor—chocolate undertones with tangy cream cheese—finished with your choice of white or dark chocolate coating.
The kitchen smelled like cocoa and cream cheese for three days straight after I first made these, and honestly I was not mad about it. My neighbor knocked on my door asking what was baking because the scent had drifted through the shared hallway. I handed her two balls on a small plate and she stood right there in the doorway eating them without even making it back to her apartment. That was three years ago and she still asks about them every holiday season.
I brought a tray of these to a potluck last winter and watched a quiet coworker silently eat five of them in the corner before anyone else discovered the dessert table. She later confessed she had no idea what was inside but could not stop reaching for more. That reaction alone made the hour of chilling time worth every minute.
Ingredients
- All purpose flour (1 1/4 cups, 160 g): Provides the tender structure for the cake base, and sifting it first makes a noticeable difference in how smooth the crumb turns out.
- Granulated sugar (3/4 cup, 150 g): Sweetens the cake without making it cloying since the coating adds plenty more sweetness later.
- Unsweetened cocoa powder (2 tbsp, 16 g): Just enough to give that subtle chocolate undertone that makes red velvet distinct from a plain vanilla cake.
- Baking soda (1/2 tsp): Gives the cake a gentle lift so it stays moist rather than turning dense and heavy.
- Salt (1/4 tsp): A small pinch that wakes up every other flavor in the batter.
- Buttermilk (1/2 cup, 120 ml, room temperature): The secret to that signature velvet texture, and letting it warm up first helps the batter come together smoothly.
- Unsalted butter (1/2 cup, 110 g, softened): Adds richness to the cake and blends best when it is truly soft, not melted.
- Large eggs (2, room temperature): Bind everything together and create that soft, plush crumb when combined properly.
- Vanilla extract (1 tsp for cake plus 1/2 tsp for filling): Use the real stuff here because the flavor carries through the entire bite.
- Red food coloring (1 tbsp): What gives these their dramatic crimson color, and gel coloring works far better than liquid.
- Cream cheese (8 oz, 225 g, softened): The heart of the filling, so use full fat and let it sit out until it is completely soft with no cold spots.
- Powdered sugar (1/4 cup, 30 g): Sweetens the filling gently without adding any graininess.
- White or dark chocolate (10 oz, 285 g): The coating that seals everything in, and melting wafers tend to give a cleaner finish than chopped bars.
- Red or white sprinkles (optional): A festive finishing touch that takes almost no effort but makes them look party ready.
Instructions
- Bake the red velvet cake:
- Preheat your oven to 350 degrees F and grease an 8 by 8 inch pan with parchment. Whisk the dry ingredients in one bowl and blend the wet ingredients with the red food coloring in another until that gorgeous crimson color is uniform. Pour the combined batter into the pan and bake for 18 to 20 minutes until a toothpick slides out clean, then let it cool completely.
- Whip the cheesecake filling:
- Beat the softened cream cheese with powdered sugar and vanilla until the mixture is completely smooth and spreadable. If it feels too soft to hold a shape, pop it in the fridge for about 15 minutes to firm up slightly.
- Form the balls:
- Crumble the cooled cake into fine pieces in a large bowl, then add the cheesecake mixture and work it together with your hands until a dough forms. Roll into 1 inch balls and set them on a parchment lined sheet, then freeze for a full hour until they are solid enough to dip without falling apart.
- Dip and coat:
- Melt the chocolate in 20 second bursts in the microwave, stirring between each interval until it flows smoothly. Drop each frozen ball into the chocolate, roll it around with a fork to coat evenly, and lift it out gently back onto the parchment.
- Set and finish:
- Add sprinkles right away while the chocolate is still wet because it sets faster than you expect. Let them harden at room temperature or speed things up in the fridge, then serve them chilled or at room temperature.
 Pin it
 One Christmas I boxed up a batch of these in little wax paper cups and gave them as gifts to my family, and my aunt called me the next morning asking for the recipe before she had even finished her coffee. She said she ate three for breakfast and felt absolutely no guilt about it.
Choosing Your Chocolate Coating
White chocolate gives a beautiful contrast against the deep red interior and looks stunning on a dessert table, but dark chocolate creates a more sophisticated flavor balance that cuts through the sweetness. I have tried ruby chocolate once on a whim and it was a revelation, adding a subtle berry tang that complemented the cheesecake perfectly. Use whatever makes you happy because the cake and filling do all the heavy lifting flavor wise.
Make Ahead and Storage
These balls are one of the best make ahead desserts I know because they actually improve after a night in the fridge as the flavors meld together. Store them in a single layer in an airtight container and they will keep for up to a week, though they rarely last that long in my house. You can also freeze the undipped balls for up to a month and dip them fresh whenever you need a quick impressive dessert.
Serving Ideas and Variations
There are so many ways to dress these up depending on the occasion and what you have on hand.
- A splash of Baileys or Chambord in the cheesecake filling turns these into an elegant adult dessert that disappears fast at dinner parties.
- Drizzle a contrasting color of melted chocolate over the finished balls for a professional looking finish.
- Always let them sit out for about ten minutes before serving so the cheesecake center softens to the perfect creamy texture.
 Pin it
 Every time I make these I think about that first batch and how something so simple turned into the dessert everyone in my circle requests by name. They are little bites of joy that taste like you spent far more effort than you actually did.
Recipe Q&A Section
- → How long do red velvet cheesecake balls stay fresh?
-
Store in an airtight container in the refrigerator for up to 1 week. For longer storage, freeze for up to 1 month. Let thaw in the fridge before serving.
- → Can I use store-bought red velvet cake?
-
Yes, you can use a store-bought red velvet cake or cake mix to save time. Just ensure it's fully cooled before crumbling and mixing with the cheesecake filling.
- → What's the best chocolate for coating?
-
Both white and dark chocolate work beautifully. White chocolate provides a creamy contrast, while dark chocolate offers a richer finish. Use melting wafers for smoothest results.
- → Why do my cheesecake balls fall apart when dipping?
-
The mixture needs to be thoroughly chilled before coating. Freeze for at least 1 hour until firm. If still too soft, add more cake crumbs to the mixture or chill longer.
- → Can I make these ahead of time?
-
Absolutely! Prepare and freeze the uncoated balls for up to 2 weeks. Coat with chocolate when ready to serve, or coat and store in the fridge for up to a week.
- → What's the best way to melt chocolate for coating?
-
Melt in 20-second intervals in the microwave, stirring between each interval. Alternatively, use a double boiler on low heat. Avoid overheating as chocolate can seize.
