 Pin it
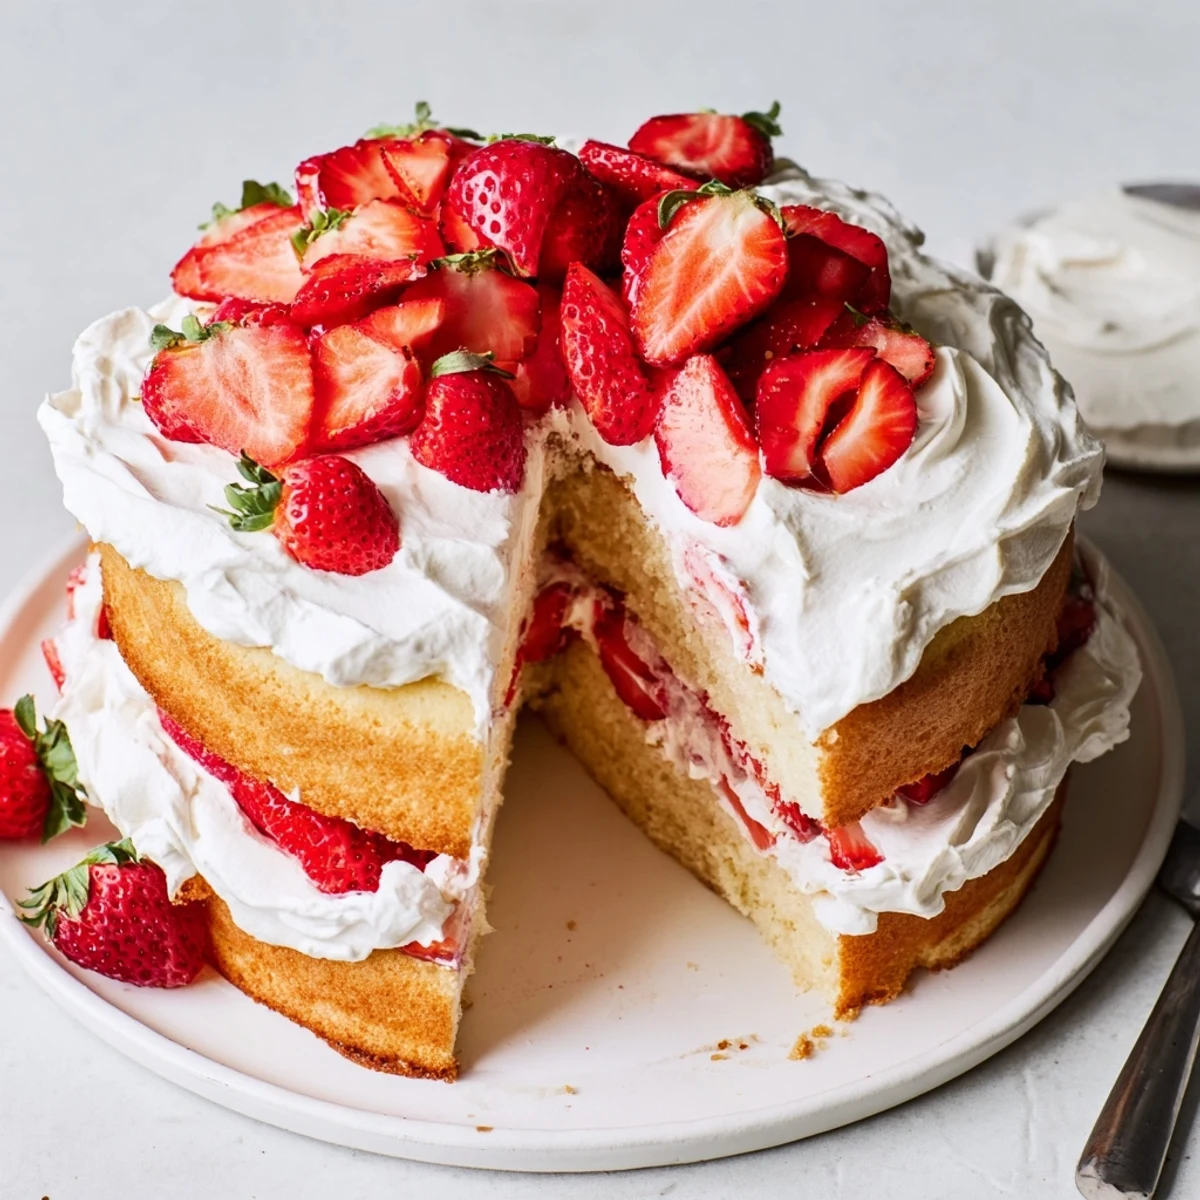
 This elegant layered dessert combines three essential elements for maximum impact: a tender vanilla buttermilk sponge, juicy macerated strawberries that release their natural sweetness, and billowy whipped cream. The cake bakes into light, golden layers that serve as the perfect foundation for the fresh fruit filling. What sets this apart from classic shortcake is the impressive presentation—it layers high like a celebration cake while maintaining all the beloved flavors of the traditional treat.
The magic happens during assembly when the strawberry juices soak slightly into the cake layers, creating those coveted moist pockets. An hour of chilling time lets everything meld together, making each slice stable enough to serve yet incredibly soft and luscious. Ideal for feeding a crowd at summer parties, this dessert captures everything wonderful about strawberry season in cake form.
Last June my sister dropped by with a basket of strawberries from the farmers market, and we ended up improvising this cake instead of making our usual shortcake biscuits. The sponge soaks up all those gorgeous red juices in a way biscuits never could.
I made this for my book club last month and watched three normally reserved women practically lick their plates. Someone asked for the recipe before she'd even finished her last bite.
Ingredients
- 2 cups all-purpose flour: The foundation of your sponge, providing structure without weighing it down
- 2 tsp baking powder: Ensures those nice tall layers rise properly in the oven
- ½ tsp baking soda: Works with the buttermilk for extra lift and tenderness
- ½ tsp salt: Balances sweetness and enhances vanilla flavor
- ½ cup unsalted butter: Use this at room temperature for proper creaming with sugar
- 1 cup granulated sugar: Sweetens the cake while creating a tender crumb structure
- 3 large eggs: Room temperature eggs incorporate better for a uniform texture
- 1 tbsp vanilla extract: Pure vanilla makes all the difference in a simple cake
- ¾ cup buttermilk: Adds moisture and subtle tang while activating the baking soda
- 1½ lbs fresh strawberries: Pick the reddest ones you can find, they will only get sweeter
- ½ cup granulated sugar for filling: Draws out those incredible strawberry juices
- 2 tsp lemon juice: Brightens the berry flavors and helps maceration
- 2 cups heavy whipping cream: Cold cream whips up faster and holds its shape longer
- ¼ cup powdered sugar: Sweetens and stabilizes the whipped cream
- 1 tsp vanilla extract: Aromatic enhancement for the cream layer
Instructions
- Get your oven ready:
- Preheat to 350°F and grease two 8-inch round pans with butter, then line the bottoms with parchment paper for easy removal later.
- Mix the dry ingredients:
- Whisk together flour, baking powder, baking soda, and salt in a medium bowl, then set aside.
- Cream the butter and sugar:
- Beat softened butter and sugar until pale and fluffy, about 3 minutes, then add eggs one at a time.
- Add vanilla and combine:
- Pour in the vanilla and mix briefly, then alternately add the flour mixture and buttermilk, starting and ending with the flour.
- Bake the layers:
- Divide batter evenly between pans and bake for 22 to 25 minutes until a toothpick comes out clean.
- Cool completely:
- Let the cakes rest in pans for 10 minutes, then turn them out onto wire racks to cool entirely before filling.
- Prepare the strawberries:
- Toss sliced berries with sugar and lemon juice, then let them sit for at least 20 minutes until juicy.
- Whip the cream:
- Beat cold heavy cream with powdered sugar and vanilla until stiff peaks form, being careful not to overwhip.
- Assemble the cake:
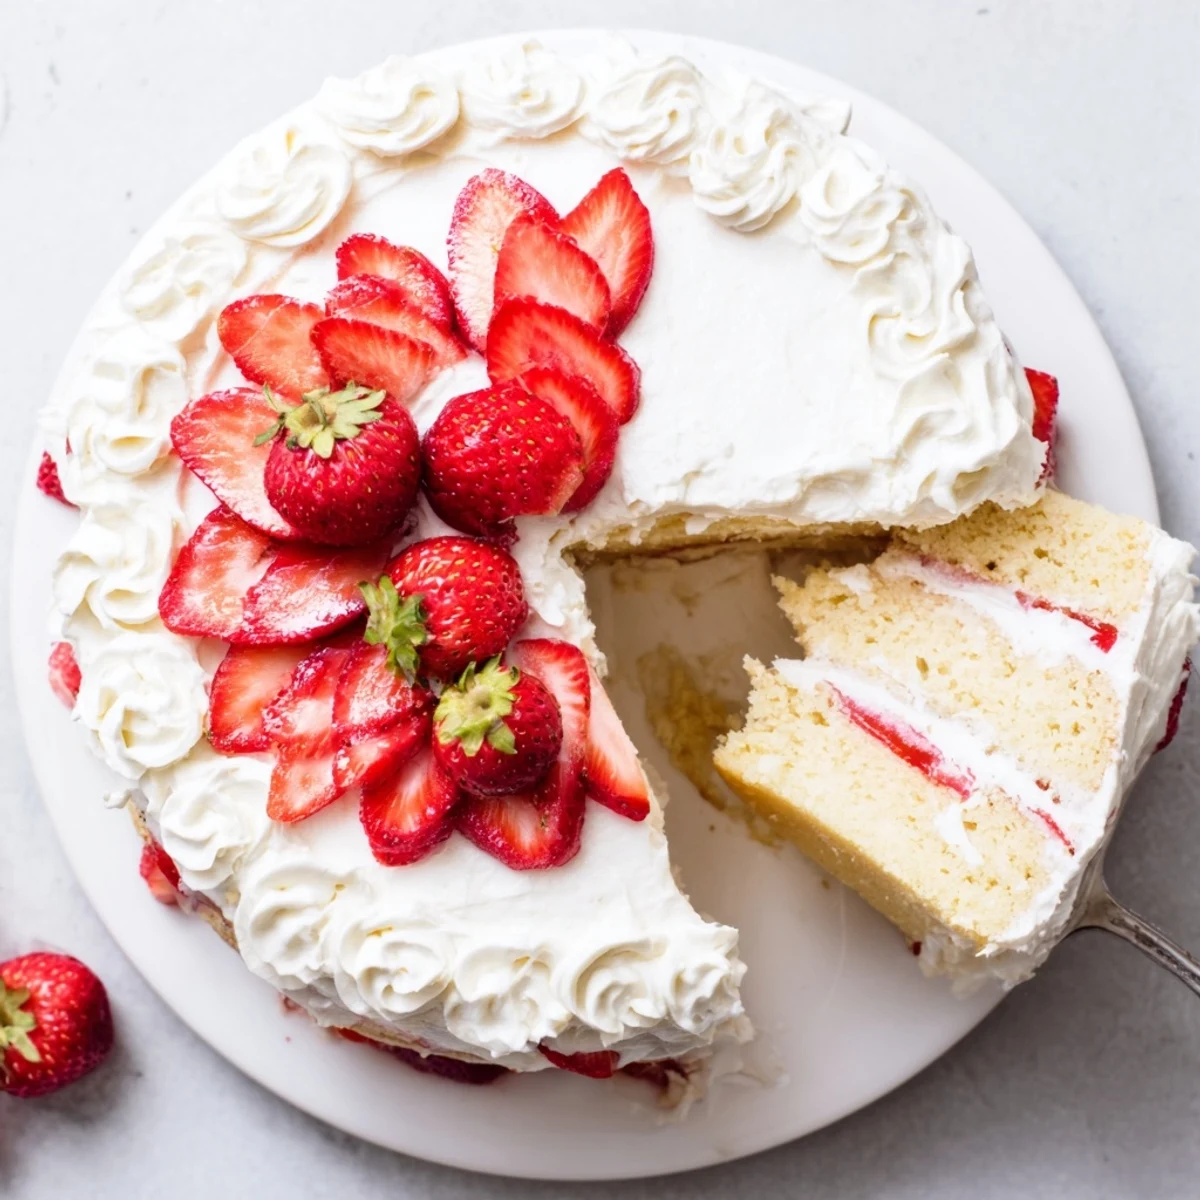
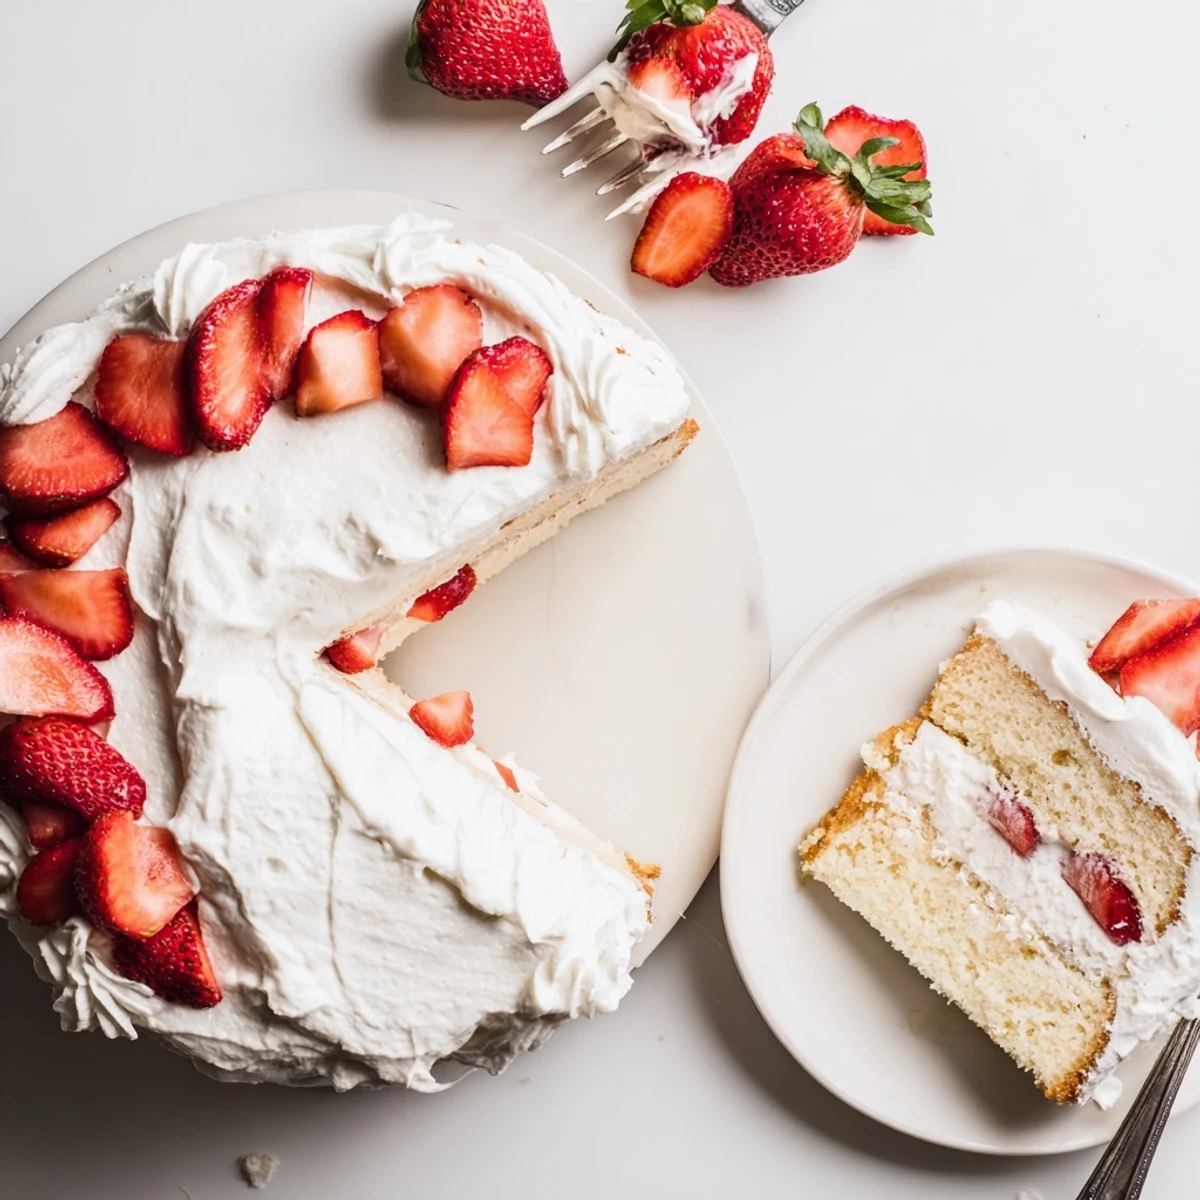
- Place one layer on your plate, top with half the strawberries and juice, then spread half the whipped cream.
- Finish and chill:
- Add the second cake layer, remaining strawberries, and remaining cream, then refrigerate for 1 hour before serving.
 Pin it
 My daughter requested this for her birthday instead of a frosted cake, and honestly it was the best decision. The fresh berries made it feel so special without being overly sweet.
Making It Ahead
You can bake the cake layers a day in advance and wrap them tightly in plastic at room temperature. The strawberry filling gets even better after a few hours in the fridge.
Serving Suggestions
This cake needs no adornment, but a few whole strawberries on top make it look professionally done. A light dusting of powdered sugar right before serving adds a nice touch.
Storage and Keeping
Cover the assembled cake loosely and refrigerate for up to 2 days, though the texture is best on the first day. The strawberries will continue to release juice over time.
- Bring chilled slices to room temperature for 15 minutes before eating
- Leftovers make an incredible breakfast the next morning
- Avoid freezing as the cream and strawberries do not thaw well
 Pin it
 There is something about homemade strawberry cake that makes people slow down and linger at the table longer.
Recipe Q&A Section
- → Can I make the cake layers ahead of time?
-
Absolutely. Bake and cool the vanilla sponge layers completely, then wrap tightly in plastic and freeze for up to 3 months. Thaw overnight in the refrigerator before assembling with fresh filling.
- → Why do the strawberries need to macerate?
-
Tossing sliced berries with sugar and lemon juice draws out their natural juices, creating a syrupy consistency that soaks into the cake layers. This process takes about 20 minutes and ensures every bite stays moist and flavorful.
- → How do I prevent the whipped cream from melting?
-
Chill your bowl and whisks in the freezer for 10 minutes before whipping. Use cream straight from the refrigerator and whip just until stiff peaks form. Assemble the entire cake, then chill for at least 1 hour before serving.
- → Can I use frozen strawberries instead of fresh?
-
Fresh strawberries work best since they maintain their texture and bright flavor. If using frozen, thaw completely and drain excess liquid before macerating. The result will be softer but still delicious.
- → What's the best way to slice this cake cleanly?
-
Run your knife under hot water and wipe dry between slices. Use a gentle sawing motion rather than pressing down. The hour of chilling time is crucial—it helps the layers set so they don't slide or squish when cutting.
- → Can I make this gluten-free?
-
Yes. Substitute the all-purpose flour with a high-quality gluten-free measure-for-measure flour blend. The texture may be slightly denser but still wonderfully light and delicious.
