 Pin it
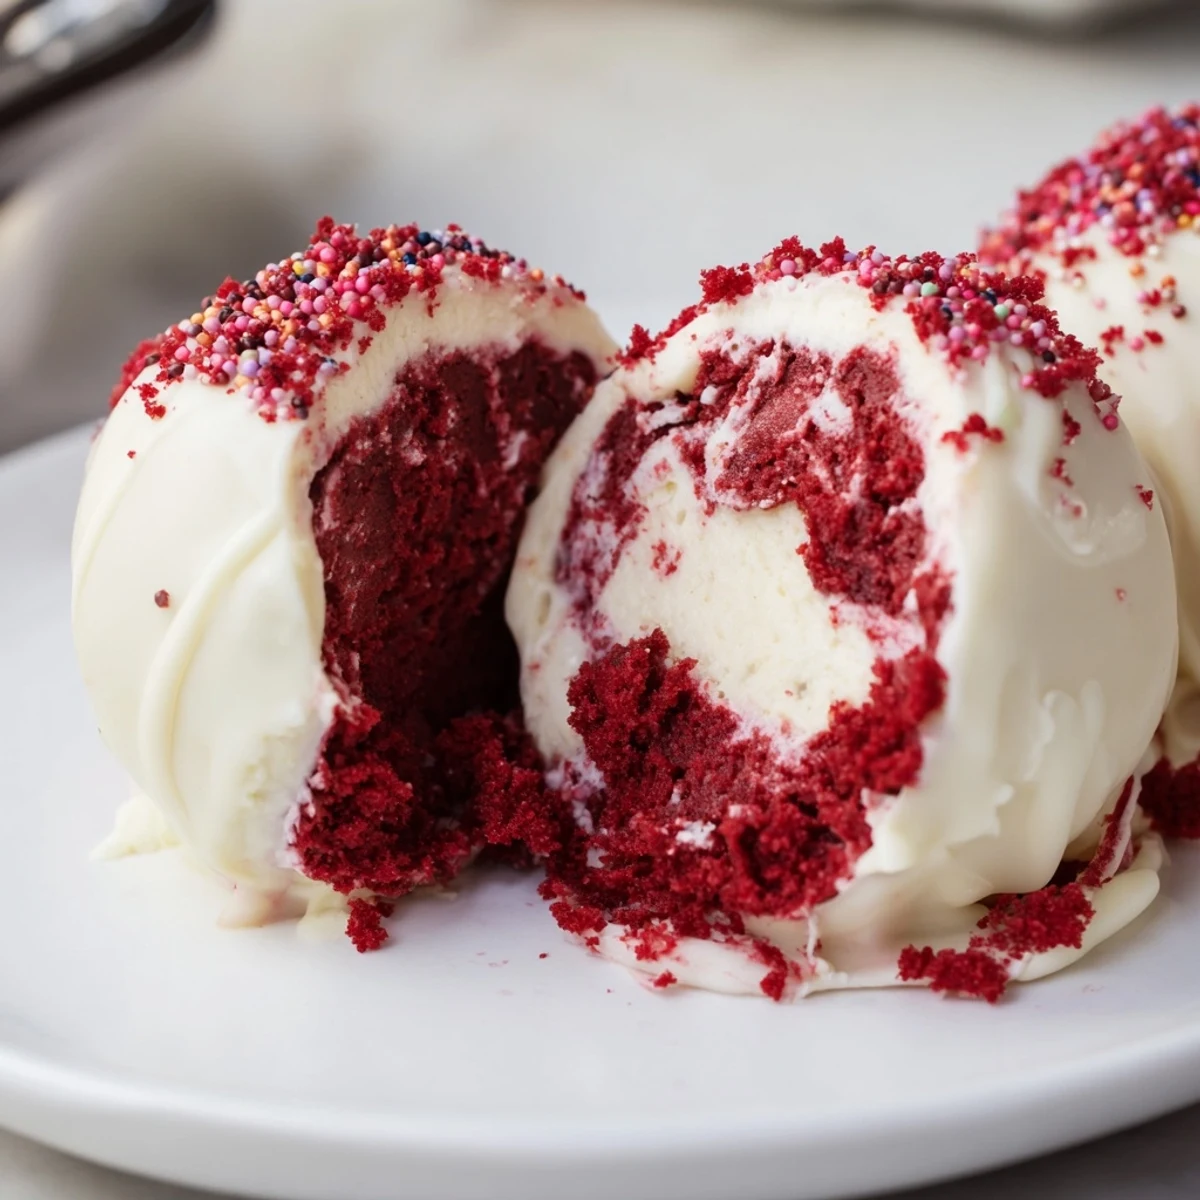
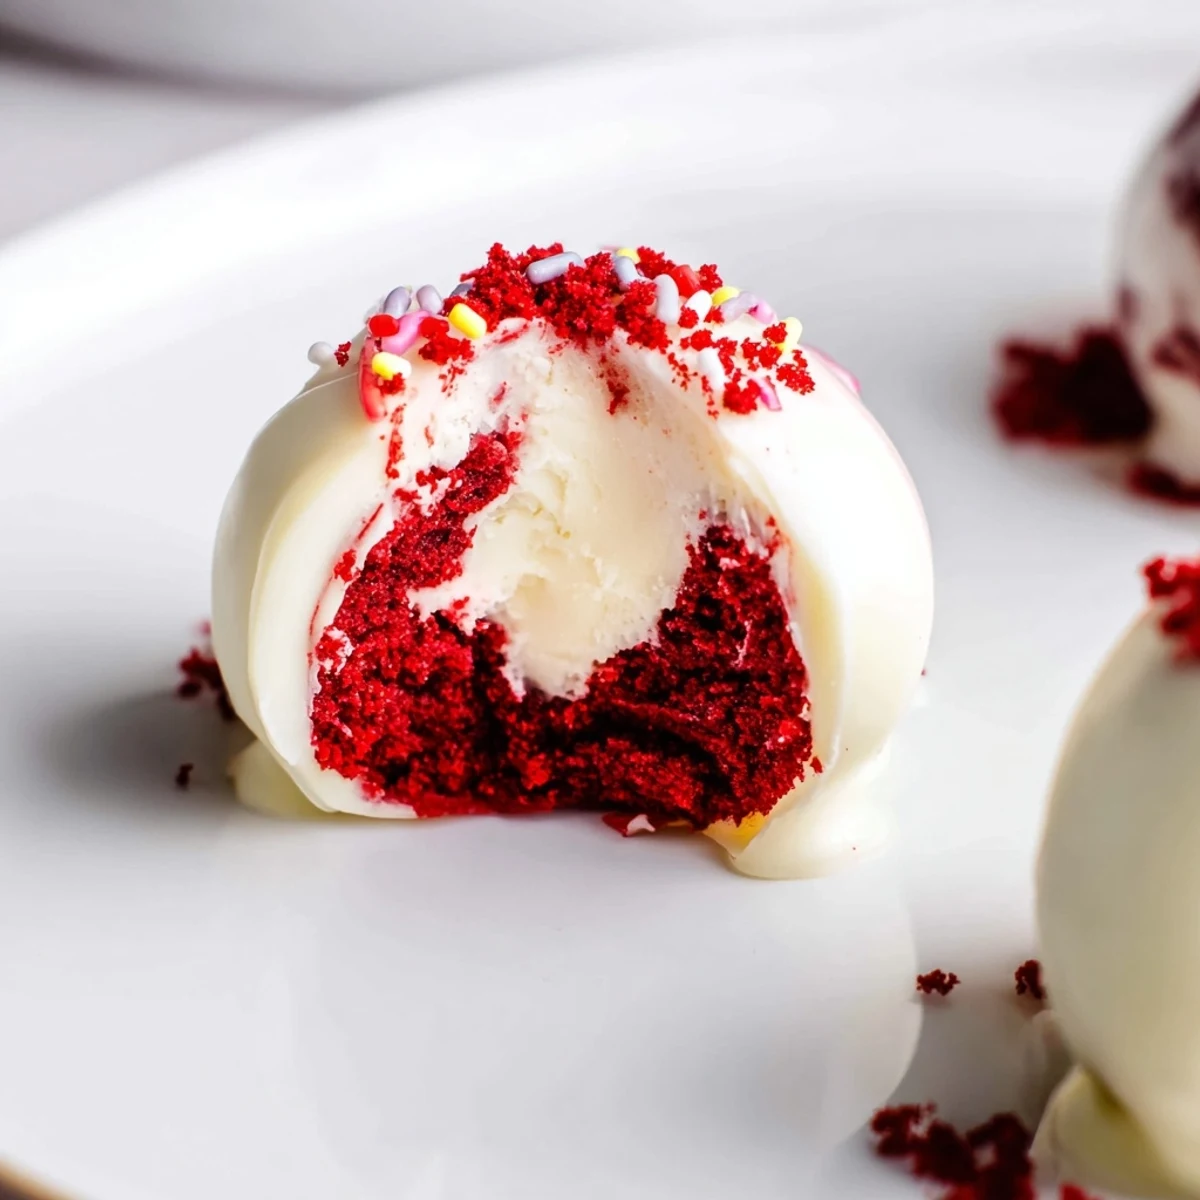
 These bite-sized red velvet cheesecake balls pair crumbled red velvet cake with a sweet, creamy cream cheese filling, rolled into tablespoon-sized portions and chilled until firm. After chilling, dip each ball in gently melted chocolate and let the coating set. Use a double boiler or short microwave bursts to melt chocolate without seizing, and finish with cake crumbs, sprinkles, or chopped nuts. Store chilled up to five days or freeze for longer storage.
The kitchen smelled like cocoa and sugar the afternoon my niece declared she wanted something red and fancy for her birthday, and these little cheesecake balls saved me from a full layer cake meltdown.
I brought a tray of these to a holiday potluck expecting them to disappear quietly, and three people cornered me by the punch bowl demanding the recipe before dessert was even served.
Ingredients
- Red velvet cake (300 g): Use fully cooled cake whether homemade or store bought, because warm crumbs make the mixture greasy instead of doughy.
- Cream cheese (200 g, softened): Leave it on the counter for an hour so it blends smoothly without lumps in the filling.
- Powdered sugar (40 g): Just enough sweetness to pull the cheesecake filling together without overpowering the cocoa flavor.
- Vanilla extract (1 tsp): A small splash that rounds out the tang of the cream cheese beautifully.
- White chocolate (250 g): Good quality coating chocolate melts thinner and gives a cleaner shell than cheap baking chips.
- Red food coloring (optional): A few drops stirred into the melted white chocolate gives a vivid candy coating.
- Red velvet crumbs and sprinkles (optional): Press them on while the chocolate is still wet or they will slide right off.
Instructions
- Crumble the cake:
- Break the red velvet cake apart with your fingers and rub the pieces into fine, even crumbs in a large bowl, discarding any crusty browned edges that refuse to soften.
- Whip the filling:
- Beat the softened cream cheese, powdered sugar, and vanilla together until the mixture is silky with no streaks, scraping the bowl once halfway through.
- Bring it all together:
- Pour the cream cheese mixture over the crumbs and mash everything with a fork until it forms a moist dough that holds together when you squeeze a spoonful.
- Roll into balls:
- Scoop tablespoon sized portions and roll them between your palms, pressing gently so they do not crack, then arrange them on a parchment lined tray.
- Chill until firm:
- Slide the tray into the refrigerator for at least one hour so the balls firm up enough to handle without collapsing in the warm chocolate.
- Melt the chocolate:
- Warm the white chocolate in short microwave bursts or over simmering water, stirring between each round until it flows like heavy cream.
- Dip and coat:
- Drop each chilled ball into the chocolate, roll it with a fork to cover completely, tap off the excess, and set it back on the parchment.
- Decorate while wet:
- Scatter crumbs or sprinkles over the tops immediately because the shell sets fast and nothing will stick once it hardens.
- Let them set:
- Leave the tray at cool room temperature or pop it in the fridge briefly until the coating is firm to the touch before serving.
 Pin it
 My niece still asks for these every birthday, and I keep wondering whether she loves the taste or just the dramatic red candy shell.
Storing Your Extras
Keep finished balls in a single layer inside an airtight container in the refrigerator and they hold their texture for up to five days without weeping.
Swapping the Chocolate Coating
Dark or milk chocolate works just as well as white if you prefer a deeper cocoa flavor, and honestly a semisweet shell balances the sweetness of the cake beautifully.
Rolling crushed pecans or shredded coconut into the filling mixture adds a pleasant crunch that surprises people in the best way.
- Freeze the undipped balls for up to a month and coat them fresh when you need a quick dessert.
- A tiny pinch of salt in the cream cheese filling cuts the richness and keeps people reaching for seconds.
- Always taste your cake crumbs before mixing, because some store bought brands are sweeter than you expect.
 Pin it
 These little bites have a way of disappearing faster than anything else on the dessert table. Make a double batch and thank yourself later.
Recipe Q&A Section
- → How do I stop the balls from falling apart when coating?
-
Chill the formed balls at least one hour so they firm up; a cold center helps the coating set quickly. If the mixture feels too soft, add a few more cake crumbs or a touch more chilled cream cheese until it holds shape.
- → Which chocolate works best for coating?
-
White, dark, or semisweet chocolate all work. Use couverture or candy melts for smooth coverage; if using real chocolate, melt slowly and consider adding a teaspoon of neutral oil to improve flow and shine.
- → Can I color the coating red without altering texture?
-
Use oil-based or gel food coloring designed for chocolate, or choose red candy melts. Avoid adding water-based color directly to melted chocolate, which can cause it to seize.
- → How should I store finished balls?
-
Keep them in an airtight container in the refrigerator for up to five days. For longer storage, freeze on a tray until solid, then transfer to a sealed container for up to one month; thaw in the fridge before serving.
- → Any quick variations to change flavor or texture?
-
Fold in 1–2 tablespoons of crushed nuts or shredded coconut into the filling for crunch, swap white chocolate for dark for a richer contrast, or add a pinch of cocoa powder or citrus zest to the filling for extra depth.
- → What allergen concerns should I note?
-
These bites contain dairy from cream cheese and chocolate and gluten if the cake includes wheat. They may also contain eggs or soy depending on the cake and chocolate used—always check labels when using store-bought components.
