 Pin it
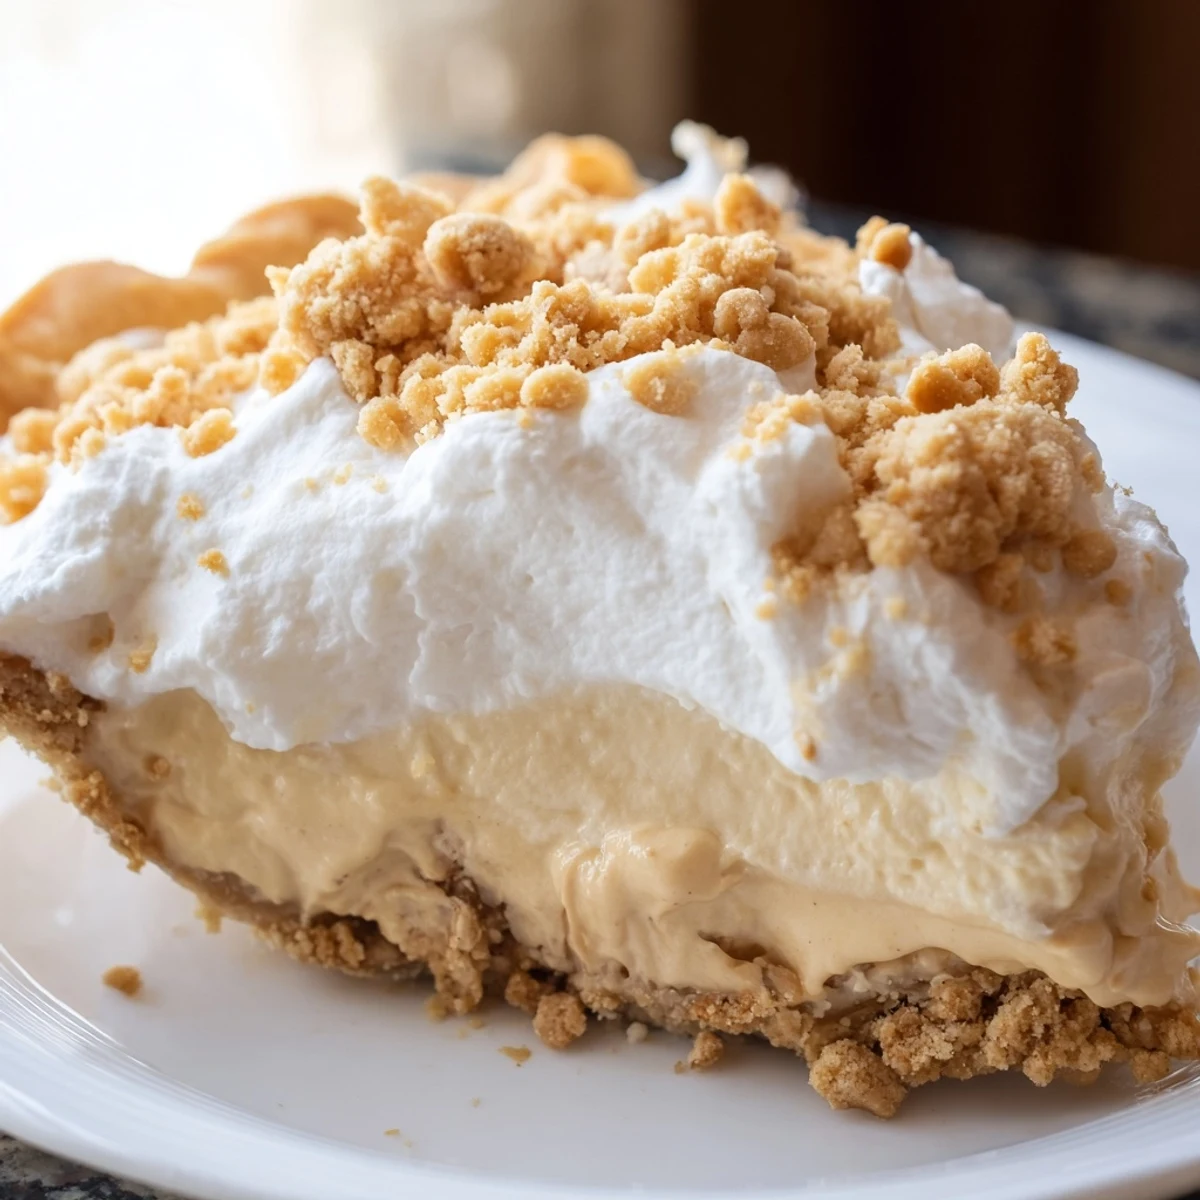
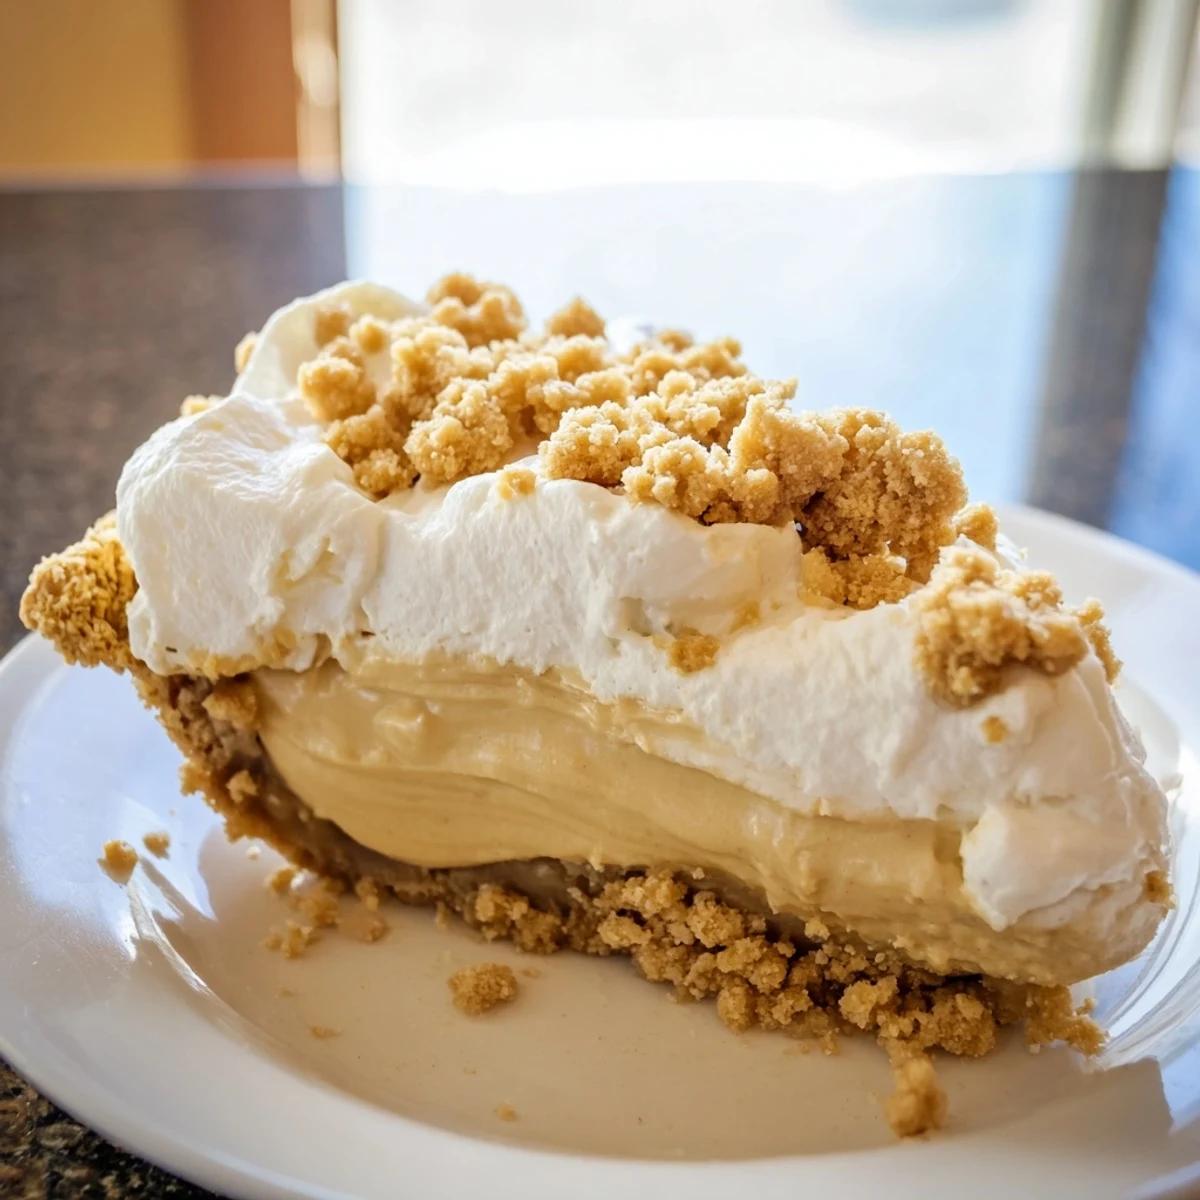
 This classic Amish dessert brings together the beloved taste of creamy peanut butter in a velvety, smooth filling. The creation begins with a buttery pie shell layered with sweet peanut butter crumbles, then topped with a silky custard-style filling made from whole milk, egg yolks, vanilla, and butter. After chilling until perfectly set, the pie is crowned with freshly whipped cream and a final dusting of those irresistible peanut butter crumbs. The result is a dreamy, comforting sweet treat that balances sweetness with the nutty, savory depth everyone loves. Perfect for gatherings, holidays, or whenever you crave something nostalgic and satisfying.
My grandmother kept a faded index card in her recipe box with this pie scribbled in pencil, corners worn soft from years of pulling it out for Sunday dinners. The first time I made it myself, I stood over that saucepan whisking the milk mixture until my arm actually ached, wondering if I'd messed something up because it felt like it was taking forever to thicken. Then suddenly—like magic—the whole thing transformed into this silky, glossy custard that smelled like pure comfort. Now it's the pie my kids beg for on birthdays, and I've learned that sore arm is absolutely worth every creamy bite.
Last summer I made three of these pies for our neighborhood block party, and honestly, I was nervous because pies can be so finicky with company coming. My neighbor Sarah took one bite and literally closed her eyes, saying it reminded her of the pie her Amish grandmother used to make when she was little. By the time I went back for seconds, there was nothing left but a few crumbs on the serving plate and people asking if I'd share the recipe. Now whenever I see that certain look of homesweet nostalgia on someone's face after tasting it, I know exactly why this recipe has stuck around through generations.
Ingredients
- 1 9-inch prepared pie crust: I've learned that baking it completely the day before makes assembly so much less stressful
- 3/4 cup creamy peanut butter: The regular kind works beautifully here, no need to splurge on the fancy stuff
- 1 cup powdered sugar: This combines with the peanut butter to make those incredible crumbles that are the secret star of the show
- 2/3 cup granulated sugar: Balances the peanut butter without making the filling cloyingly sweet
- 1/3 cup all-purpose flour: The old fashioned thickener that gives this custard its character
- 1/4 teaspoon salt: Just enough to make all the flavors pop
- 2 cups whole milk: Trust me, whole milk makes a difference in the final texture
- 3 large egg yolks: Save the whites for an omelet or meringue another day
- 1 teaspoon pure vanilla extract: Don't skip this, it rounds everything out beautifully
- 2 tablespoons unsalted butter: Adds that little something extra to the filling
- 1 cup heavy whipping cream: Cold from the fridge is best for whipping
- 2 tablespoons powdered sugar: For sweetening the whipped topping just right
- 1/2 teaspoon vanilla extract: Because vanilla in the cream is never a bad idea
Instructions
- Make the magic crumbs:
- Mix the peanut butter and powdered sugar with a fork until you have these wonderful sandy crumbles that smell like heaven
- Layer the bottom:
- Spread half those crumbs right into your pie crust, pressing them down gently so they stay put
- Start the custard base:
- Whisk sugar, flour, and salt in your saucepan, then gradually stir in the milk until completely smooth
- Cook and thicken:
- Set it over medium heat and whisk constantly—you'll know it's ready when it just starts to bubble and coats the back of a spoon
- Temper those eggs:
- Whisk your yolks in a separate bowl, then slowly drizzle in some of that hot milk mixture while whisking like your life depends on it
- Combine and cook again:
- Pour everything back into the saucepan and cook two more minutes until it's thick and glossy
- Finish the filling:
- Stir in butter and vanilla until smooth, then pour over your waiting peanut butter crumbs
- The waiting game:
- Let it cool 15 minutes, then chill for at least 2 hours because patience makes perfect pie
- Whip the cream:
- Beat heavy cream, powdered sugar, and vanilla until you have those beautiful stiff peaks
- The grand finale:
- Spread that whipped cream over your chilled pie and sprinkle with the remaining crumbs right before serving
 Pin it
 There was this one rainy Tuesday when I was feeling particularly homesick, and I decided to make this pie just for myself. Standing at the counter, licking that peanut butter spoon and watching the custard thicken, I realized sometimes the best comfort food is the kind that connects you to something bigger than yourself. Every bite felt like a hug from across the years, and I ended up sharing slices with my neighbors because joy like that shouldn't be kept to yourself.
Make It Your Own
I've tried swapping in almond butter when peanut allergies were a concern, and while it's different, that creamy nutty filling still works beautifully. A graham cracker crust adds this subtle sweetness that plays really nicely with the peanut butter, especially if you crush the crackers yourself. One time I even added a layer of sliced bananas between the crumbs and filling, and honestly, it was pretty spectacular.
Serving Suggestions
This pie is incredible after it's had time to sit overnight—the flavors meld together and the texture becomes even more luxurious. I love serving it slightly chilled with a hot cup of coffee because the temperature contrast is just perfect. Sometimes I'll drizzle a little chocolate sauce over individual slices because chocolate and peanut butter are meant to be together.
Storage And Make Ahead Tips
The finished pie keeps beautifully in the refrigerator for up to 3 days, though I've never had one last that long in my house. You can make the peanut butter crumbs a day ahead and store them in an airtight container—their texture stays perfect. The crust can also be baked and cooled the day before, which makes assembly feel almost effortless.
- Always cover with plastic wrap touching the surface to prevent a skin from forming
- Let refrigerated pie sit at room temperature for 10 minutes before slicing
- The whipped topping is best added the same day you plan to serve
 Pin it
 There's something deeply satisfying about making a pie that's been loved for generations, and I hope this becomes one of those recipes you turn to again and again. Happy baking, friend.
Recipe Q&A Section
- → What makes this Amish-style pie different from regular peanut butter pies?
-
This version follows traditional Amish baking methods by creating a cooked custard filling on the stovetop rather than using whipped cream or cream cheese bases. The addition of peanut butter crumbs both in the layers and on top adds texture and intensifies the nutty flavor throughout.
- → Can I use natural peanut butter instead of creamy?
-
Creamy peanut butter works best because it provides consistent texture and sweetness. Natural varieties with separated oil may affect the crumb consistency and filling stability. If using natural, make sure to stir thoroughly and consider adding a bit more powdered sugar to achieve the right crumbly texture.
- → How long should I chill the pie before serving?
-
The filling needs at least 2 hours in the refrigerator to set completely. For best results, chill 3-4 hours or overnight. This allows the custard to firm up properly and makes clean slicing easier. The flavors also develop and meld beautifully during this resting period.
- → Can I make this ahead of time for a party?
-
Absolutely! This pie actually tastes better when made a day ahead. Prepare everything except the whipped cream topping, cover tightly, and refrigerate. Add the fresh whipped cream and remaining crumbs shortly before serving for the best texture and presentation.
- → What's the best way to get clean slices?
-
Use a sharp knife dipped in hot water and wiped clean between cuts. Chill the pie thoroughly—at least 3 hours or overnight. Run the knife under hot water, dry it quickly, and slice with gentle pressure. The heat helps cut through the creamy filling smoothly.
- → Can I freeze this peanut butter pie?
-
Yes, freeze the pie without the whipped cream topping. Wrap tightly in plastic wrap and foil, then freeze for up to 2 months. Thaw overnight in the refrigerator. Add fresh whipped cream and peanut butter crumbs after thawing for the best texture and appearance.
