 Pin it
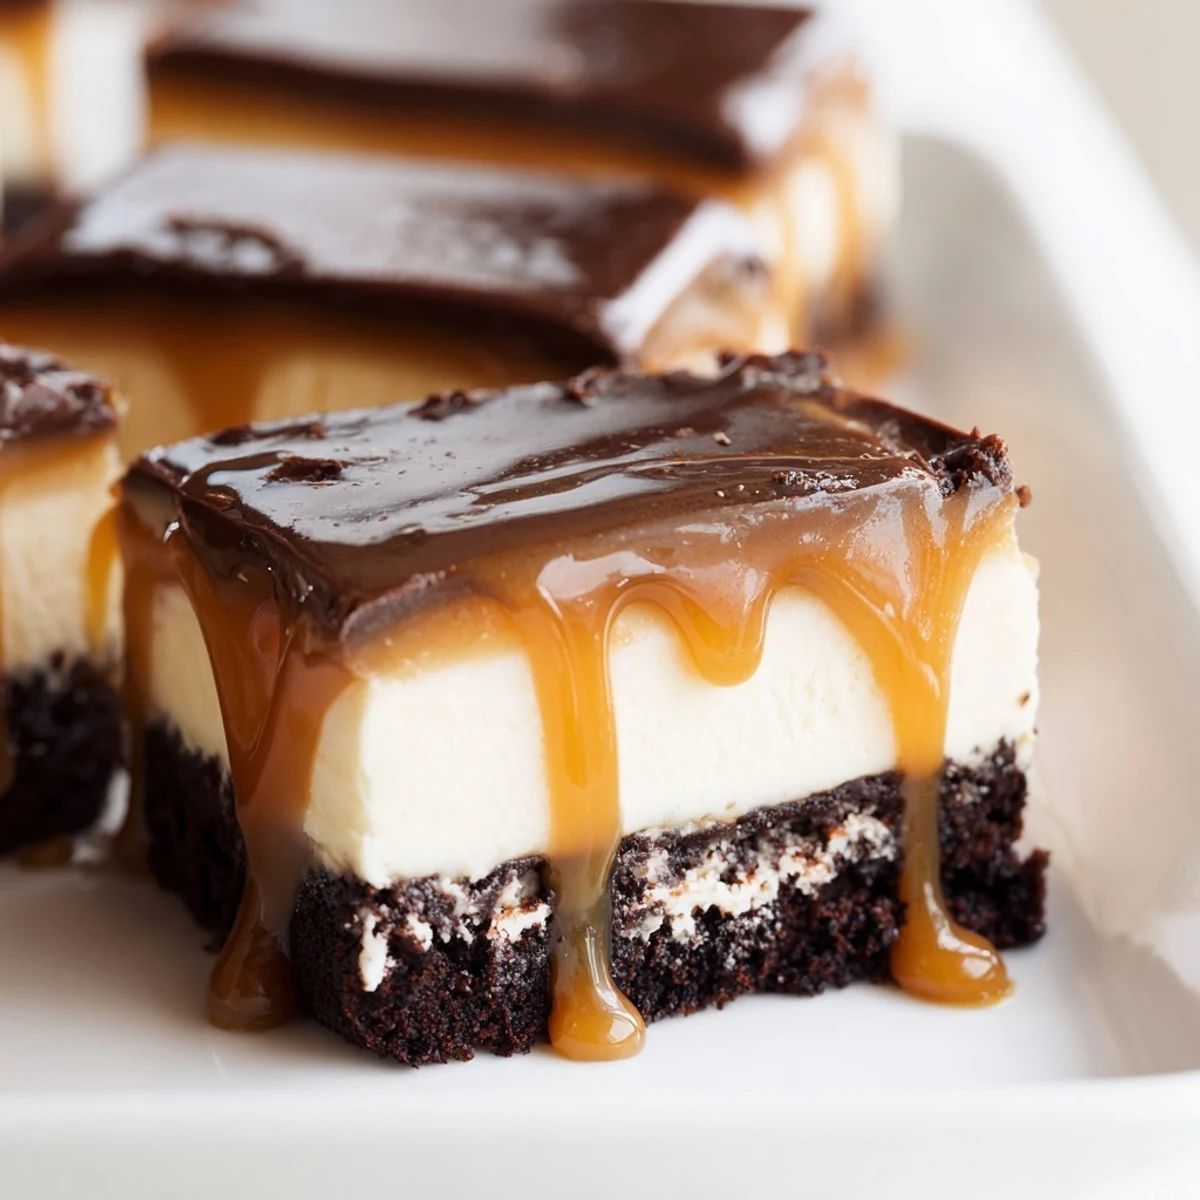
 This indulgent dessert combines three beloved treats into one spectacular creation. A fudgy, chocolatey brownie base forms the foundation, topped with a silky smooth cheesecake layer that's rich and creamy. The crowning glory is a luscious caramel topping that adds the perfect sweet finish. Though it requires some chilling time, the actual hands-on preparation is straightforward, making it accessible for bakers of various skill levels. The result is an impressive bar dessert that's sure to dazzle at gatherings.
Last winter, after a particularly long week that just wouldn't quit, I found myself standing in my kitchen at midnight craving something outrageously indulgent. I'd been dreaming about combining three of my greatest weaknesses into one impossible dessert, and somehow that Friday night felt like the perfect time to make it happen. The apartment was quiet, snow was falling outside the window, and I had zero intention of being sensible about anything.
My sister came over unexpectedly while these were chilling, and I watched her eyes widen when she saw the pan sitting on my counter. She tried to be polite and take just one square, then immediately reached for another without saying a word. Now she requests them for every family gathering, birthday, and Tuesday that ends in the letter y.
Ingredients
- 115 g (½ cup) unsalted butter: Melt this slowly and gently, whether you're using the microwave or stovetop, because burnt butter will make your brownie layer taste bitter
- 150 g (¾ cup) granulated sugar: This amount creates the perfect crackly top on your brownie layer while keeping the inside tender and fudgy
- 2 large eggs: Room temperature eggs will incorporate much more smoothly into your brownie batter, preventing any odd eggy textures
- 1 tsp vanilla extract: Don't skimp here, since vanilla is what bridges the gap between chocolate and cheesecake flavors
- 60 g (½ cup) all-purpose flour: Sift this along with your cocoa to prevent any stubborn lumps from hiding in your batter
- 30 g (⅓ cup) unsweetened cocoa powder: Use Dutch process cocoa if you can find it for that deep, nearly black chocolate color and intense flavor
- ¼ tsp salt: Just enough to make all the chocolate flavors pop without tasting salty
- 450 g (16 oz) cream cheese, softened: Let this sit out for a full two hours because cold cream cheese creates lumpy cheesecake that no amount of mixing can fix
- 100 g (½ cup) granulated sugar: This sweetens the cheesecake layer without making it cloyingly sweet, letting the cream cheese flavor shine through
- 2 large eggs: Add these one at a time and really beat after each addition, since this is what gives cheesecake its silky structure
- 1 tsp vanilla extract: Pure vanilla extract makes a noticeable difference in the cheesecake layer compared to imitation
- 60 ml (¼ cup) sour cream: This is the secret ingredient that makes cheesecake taste like it came from a professional bakery
- 180 g (¾ cup) soft caramels, unwrapped: Use the soft wrapped caramels rather than hard caramel candies because they melt into a smooth sauce
- 2 tbsp heavy cream: Warm this slightly before adding to your melted caramels for the most velvety pourable consistency
Instructions
- Prepare your pan and warm the oven:
- Preheat your oven to 175°C (350°F) and line a 23 cm (9-inch) square baking pan with parchment paper, letting the paper hang over two opposite sides to create handles for easy removal later.
- Make the fudgy brownie foundation:
- Melt the butter in a microwave-safe bowl, then whisk in the sugar, eggs, and vanilla until the mixture looks glossy and smooth. Sift in the flour, cocoa powder, and salt, then fold everything together just until no dry streaks remain. Spread this evenly into your prepared pan.
- Create the creamy cheesecake layer:
- Beat the softened cream cheese and sugar until completely smooth, then add the eggs one at a time, beating thoroughly after each one. Mix in the vanilla and sour cream until combined, then pour this over your brownie base and spread it gently to the edges.
- Bake until just set:
- Bake for 45 to 50 minutes until the center is barely set and the edges have developed a light golden color. The cheesecake layer should still have a slight wobble in the center when you gently shake the pan.
- Let it cool completely:
- Cool the bars at room temperature for at least an hour, then refrigerate for at least 2 hours until completely chilled and firm throughout.
- Prepare the caramel crown:
- Melt the unwrapped caramels with the heavy cream in a saucepan over low heat or in the microwave, stirring constantly until smooth and pourable. Let this cool for just a few minutes so it's not piping hot, then pour it over your chilled cheesecake layer and spread it gently.
- Final chill and serve:
- Refrigerate for another 30 minutes until the caramel is set, then use the parchment paper handles to lift the entire dessert out of the pan. Slice into squares and serve chilled.
 Pin it
 I brought these to a potluck last month and watched the most skeptical dessert hater in the group take what she called a tiny bite. Five minutes later, she was guarding the last square with her fork and asking if I'd be willing to share the recipe. Sometimes the most unlikely combinations become the ones people can't stop talking about.
Making These Ahead
You can prepare the brownie and cheesecake layers up to two days in advance, keeping them tightly covered in the refrigerator. Add the caramel topping the day you plan to serve them, since it stays smooth and glossy for about 24 hours before starting to seep into the cheesecake layer slightly.
Serving Suggestions
These bars are incredibly rich on their own, but a scoop of cold vanilla ice cream creates the perfect temperature contrast. A pinch of flaky sea salt on top of the caramel highlights all the flavors beautifully.
Storage and Freezing
Store these in the refrigerator in an airtight container for up to five days, though the texture is best within the first three. For longer storage, wrap individual squares tightly in plastic wrap and freeze for up to two months, thawing them in the refrigerator overnight before serving.
- Place a piece of parchment paper between stacked layers to prevent sticking
- These taste best when served slightly chilled rather than ice cold from the refrigerator
- The caramel layer becomes soft again at room temperature, so keep them chilled until serving
 Pin it
 There's something deeply satisfying about a dessert that looks like it came from a fancy bakery but came together in your own kitchen. Every time I make these, I'm reminded that the best desserts are the ones worth sharing.
Recipe Q&A Section
- → How long does this need to chill?
-
The dessert requires at least 2 hours of chilling time after baking, plus an additional 30 minutes after adding the caramel topping. Plan for approximately 3 hours total chilling time for best results.
- → Can I make this ahead of time?
-
Absolutely. This dessert actually benefits from being made a day ahead, as the flavors meld together beautifully. Store in the refrigerator, covered tightly, for up to 3 days.
- → How do I know when it's done baking?
-
The cheesecake layer should be just set in the center—slightly jiggly like Jell-O—while the edges appear lightly golden. It will continue to firm as it cools.
- → Can I use store-bought caramel?
-
Yes, store-bought caramel sauce works perfectly as a time-saving alternative. You'll need approximately ¾ cup to achieve the same coverage as the homemade version.
- → What's the best way to slice clean bars?
-
For clean cuts, run a sharp knife under hot water, wipe dry, and slice. Wipe the knife clean between each cut and reheat as needed. Chilling thoroughly before slicing is essential.
- → Can I freeze this dessert?
-
Yes, freeze individual portions wrapped tightly in plastic and aluminum foil for up to 2 months. Thaw overnight in the refrigerator before serving for best texture.
