 Pin it
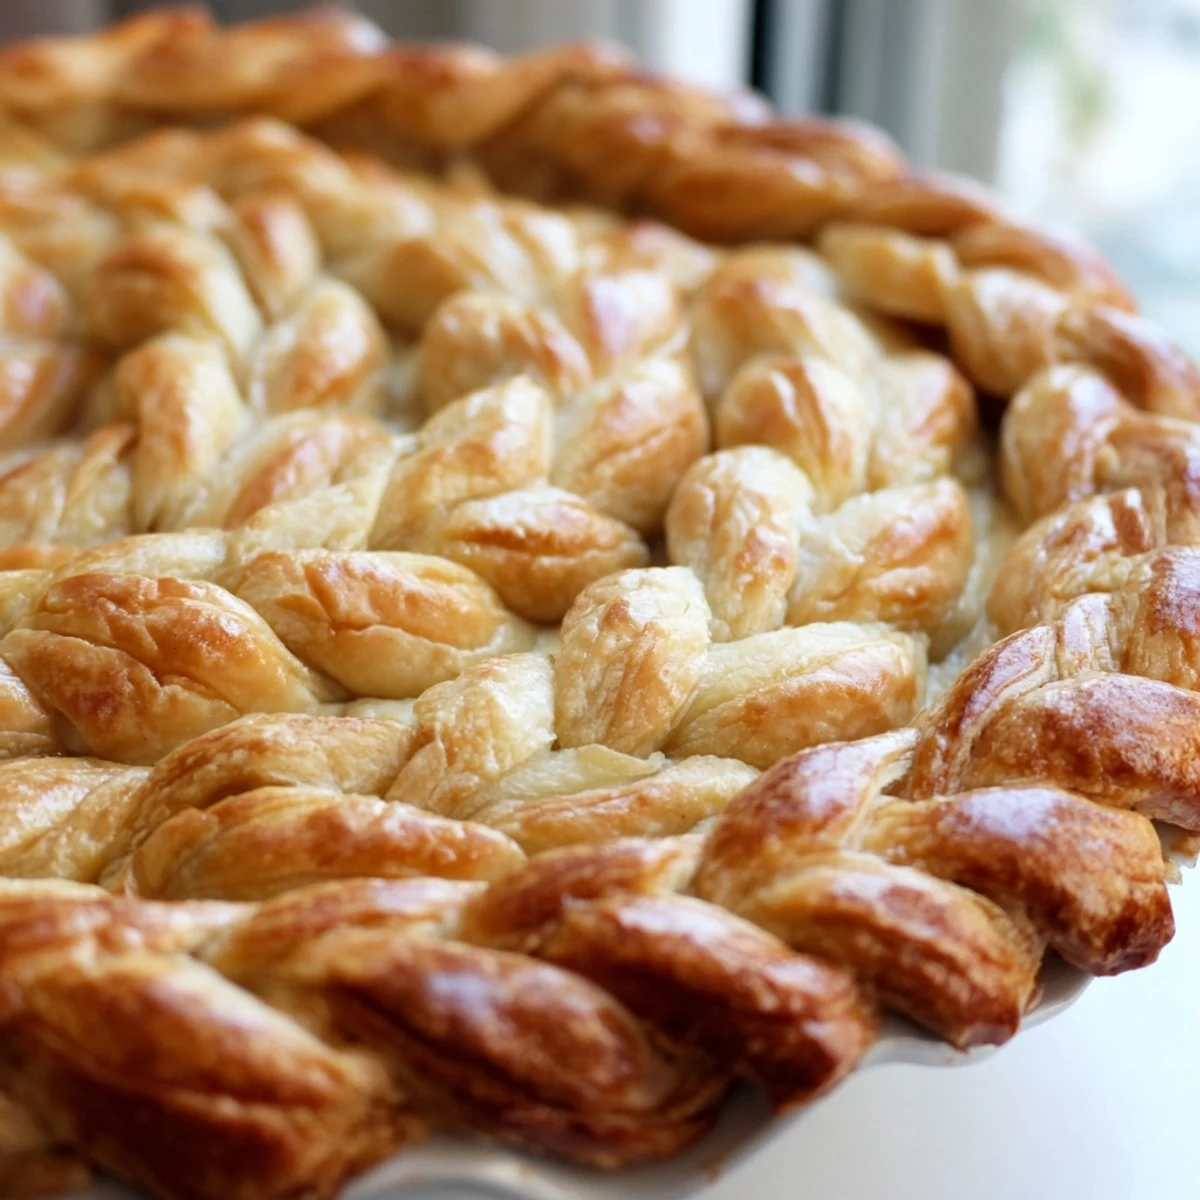
 Master the art of creating an impressive fishtail braid border for your homemade pies. This decorative technique transforms ordinary pastry into a show-stopping presentation piece. Using basic pie dough ingredients, you'll cut strips, weave them into intricate fishtail patterns, and attach them to pie edges for a professional bakery finish. The medium-level technique requires practice but delivers stunning results perfect for holidays, dinner parties, or elevating everyday baking. Works beautifully with fruit pies, quiches, and savory pot pies alike.
The first time I attempted a braided pie crust, I was trying to impress my new in-laws at Thanksgiving. My kitchen looked like a flour bomb had gone off, and I may have whispered a few choice words while trying to keep the dough strips from sticking to everything. But when that golden braided edge came out of the oven, something magical happened—my father-in-law actually asked for seconds of just the crust.
Last summer, I made a peach pie with this crust for a neighbor's potluck, and I swear I saw three people taking photos before anyone even picked up a fork. Something about that woven pattern just makes people pause and appreciate the effort, even though it is actually much easier than it looks.
Ingredients
- 2 1/2 cups all-purpose flour: The foundation of everything flaky and wonderful, scoop and level it gently to avoid packing
- 1 cup cold unsalted butter: Cold is nonnegotiable here—those solid bits melting in the oven create the flaky layers we all chase
- 1 tsp salt: Do not skip this even for sweet pies, it is what makes the butter flavor actually sing
- 1 tbsp sugar: Completely optional but adds a lovely subtle sweetness that plays beautifully with fruit fillings
- 1/4 to 1/2 cup ice water: Start with less and add gradually—too much water makes tough dough, too little makes it crumble apart
- 1 egg beaten with 1 tbsp milk: This wash gives you that gorgeous glossy golden finish that catches the light just right
Instructions
- Make the dough base:
- Whisk the flour, salt, and sugar together in a large bowl, then work in those cold butter cubes with a pastry cutter or your fingers until you see pea-sized chunks scattered throughout like edible confetti.
- Add ice water gradually:
- Drizzle in the coldest water you can muster, tossing gently with a fork, until the dough holds together when you pinch it—remember, you can always add more but you cannot take it back.
- Let it rest:
- Divide the dough into two disks, wrap them up tight, and tuck them in the fridge for at least an hour because cold dough behaves so much better than warm, stubborn dough.
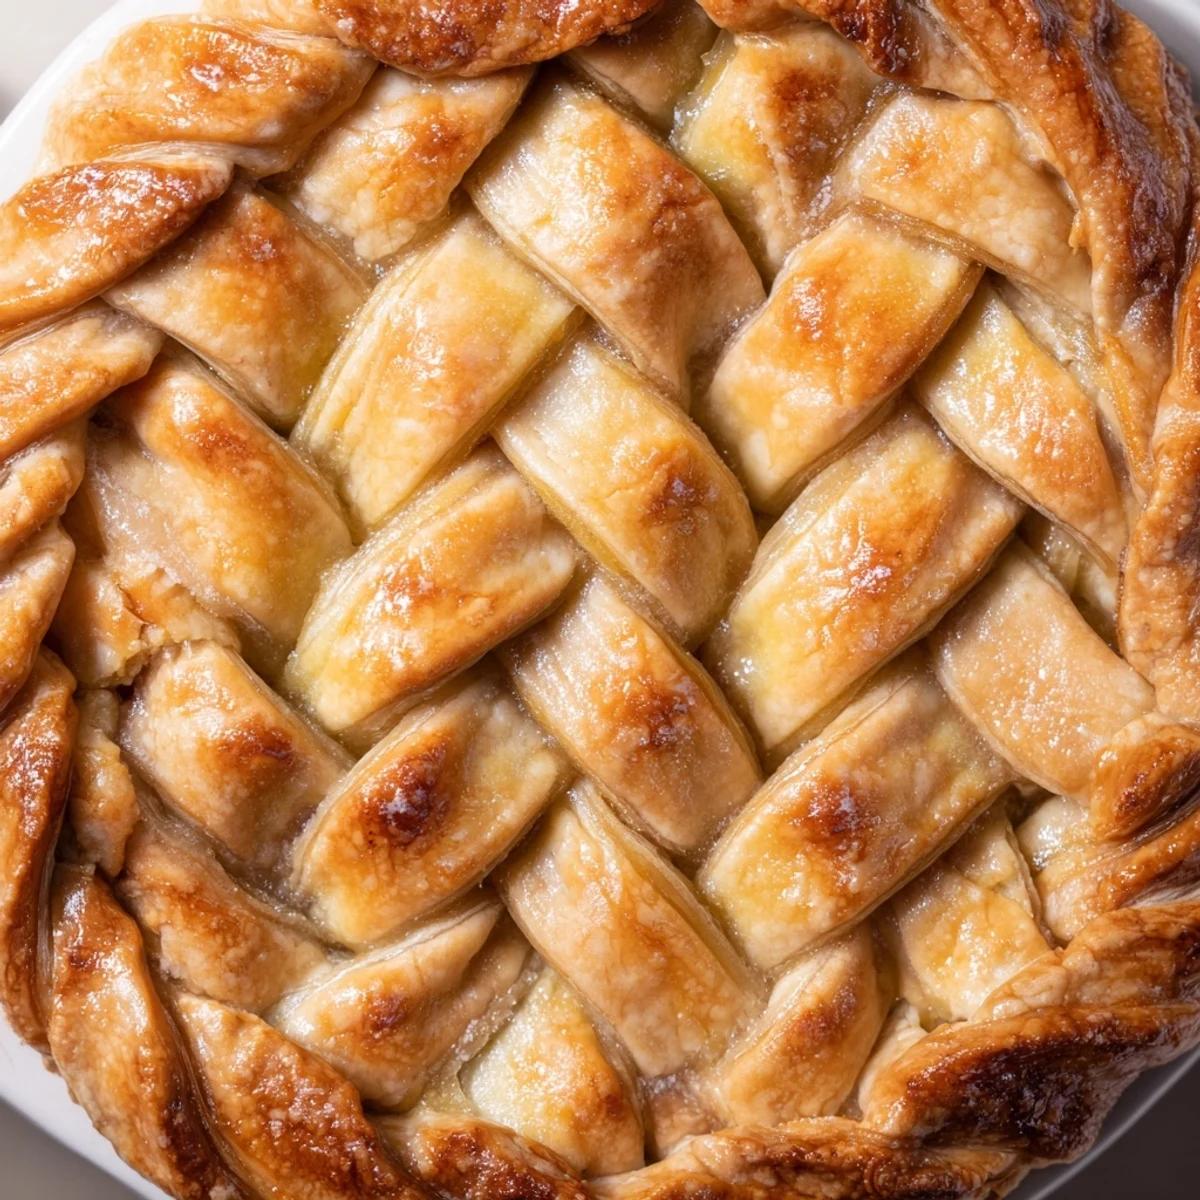
- Roll out your canvas:
- On a floured surface, roll one disk into a rectangle about 1/8 inch thick, then use a ruler and knife to cut at least six even strips—take your time here because neat strips make for a prettier braid.
- Create the fishtail magic:
- Lay three strips together, press one end to hold them, then start by crossing the right over center and left over new center before switching to the fishtail technique where you pull from the outside in, alternating sides until you reach the bottom.
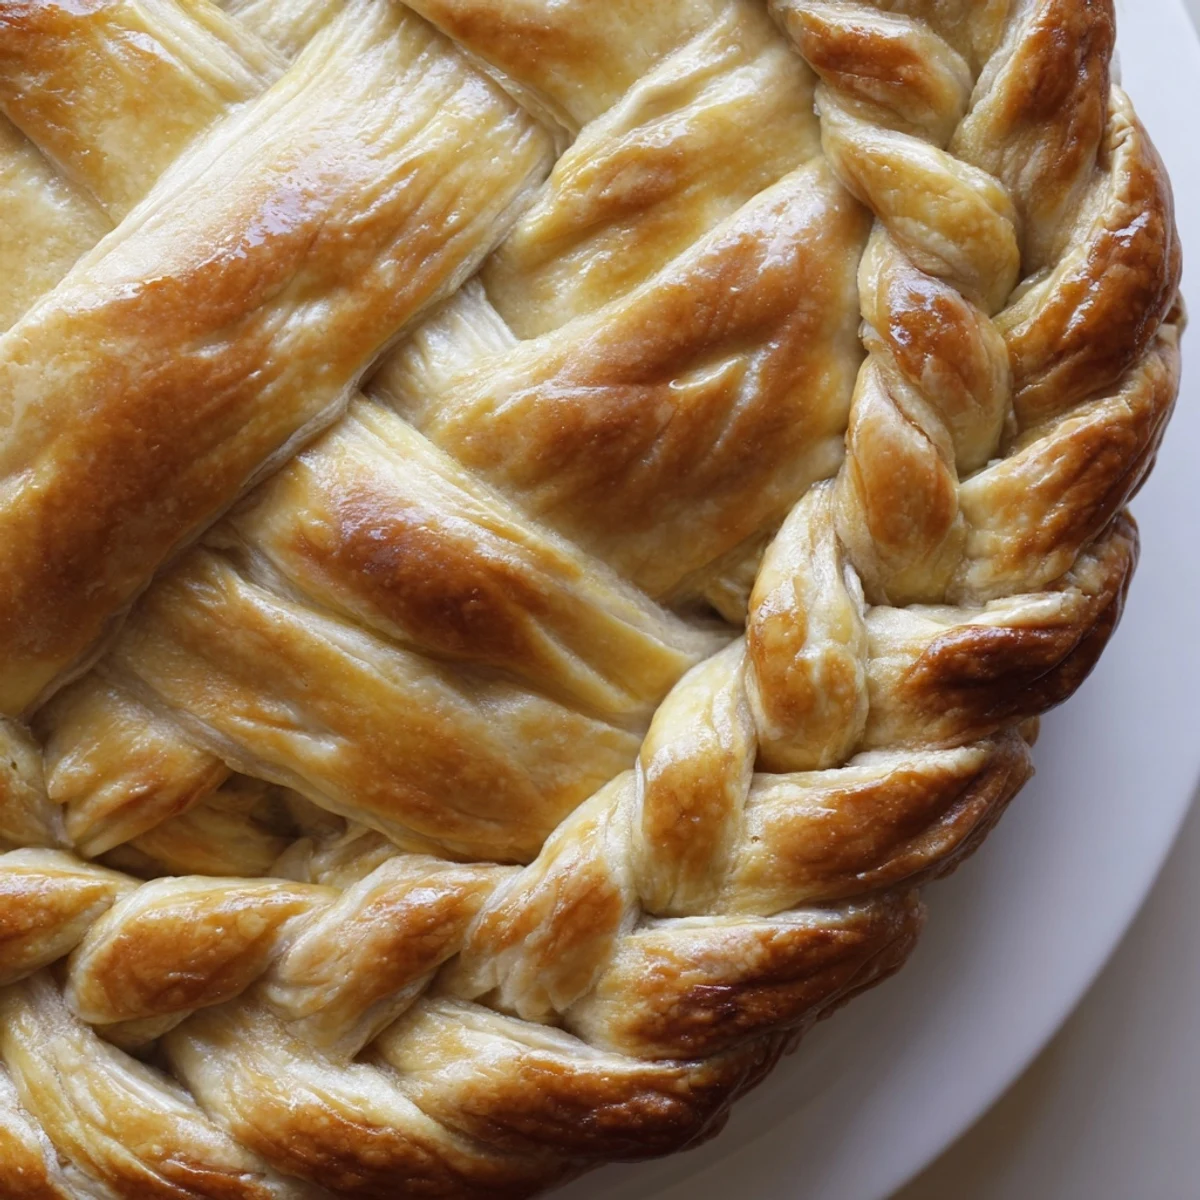
- Attach to your pie:
- Brush the edge of your filled pie with water, gently lift and position your braid around the rim, and press lightly to help it bond with the base crust like they have always been best friends.
- Give it some shine:
- Brush that beautiful braid with your egg wash, watching it transform from dull and matte to glossy and ready for its oven close-up.
- Bake to perfection:
- If you are blind baking, chill the assembled crust for 15 minutes then bake at 375°F until golden—if filling and baking together, just follow your pie recipe's timing and let that braid become the star it was meant to be.
 Pin it
 My daughter now requests this crust for her birthday pie every year, claiming the braided edge is basically edible jewelry. Watching her carefully examine the pattern before digging in reminds me that sometimes the extra effort really does create memories.
Making It Your Own
Whole wheat flour adds a lovely nutty depth that pairs beautifully with apple or pear fillings. Fresh herbs like thyme or rosemary folded into the dough create the most incredible savory crust for chicken pot pies or quiches.
Timing Tricks
The refrigerator is your best friend throughout this process—cold dough strips cut cleaner, braid more cooperatively, and hold their shape better during transfer. I have learned the hard way that rushing this step results in a frustrating mess and a less than perfect finished product.
Presentation Secrets
A ruler might feel like overkill until you see how perfectly even strips create the most professional looking braid. The egg wash is not just for looks—it helps the braid achieve that deep golden color that makes people instinctively reach for their phones to document your handiwork.
- Keep a clean pastry brush and a bowl of warm water nearby for quick cleanup
- If any strip breaks, just press it back together—the braid hides most imperfections beautifully
- Leftover braided scraps baked separately make the cook's secret snack
 Pin it
 There is something deeply satisfying about turning simple ingredients into something that looks like it belongs in a bakery window. May your kitchen be floury and your pie edges always beautifully braided.
Recipe Q&A Section
- → What makes fishtail braiding different from regular braiding?
-
Fishtail braiding differs by crossing outer strands to the center rather than weaving three strands in a traditional pattern. This creates a distinctive flattened, woven appearance that resembles a fish's tail, resulting in a more intricate and visually complex design compared to standard three-strand braids.
- → How long should dough chill before braiding?
-
Chill the dough for at least 1 hour after preparing and dividing into disks. This resting period allows gluten to relax while firming the butter, making the dough easier to roll and cut into clean strips. Cold dough also maintains its shape better during the braiding process and prevents strands from becoming warm or sticky.
- → Can I make the braids ahead of time?
-
Yes, you can prepare braids several hours in advance and refrigerate them on a parchment-lined baking sheet until ready to use. For longer storage, freeze the braided strips separately for up to 2 weeks, then thaw briefly before attaching to your pie. Just ensure they remain pliable enough to shape around the pie edge.
- → What fillings work best with braided crusts?
-
Almost any pie filling pairs beautifully with decorative braided edges. Fruit fillings like apple, cherry, and berry create stunning contrast against golden pastry. Savory options including quiches, chicken pot pies, and vegetable tarts benefit equally from the elegant presentation. The braid adds visual appeal regardless of the interior flavors.
- → How do I prevent braids from burning during baking?
-
Brush the braids with egg wash which promotes even browning rather than burning. Monitor the pie during the final 10 minutes of baking, covering edges with foil if browning too quickly. For pies requiring longer bake times, you can also apply the braids during the last 20 minutes of cooking to prevent over-browning.
- → Can I use store-bought dough for braiding?
-
Store-bought refrigerated pie dough works adequately for braiding, though homemade dough typically holds its shape better. If using purchased dough, ensure it's well-chilled and work quickly while cold. You may need to roll it slightly thinner than indicated on the package to achieve strips that are pliable enough for intricate fishtail weaving.
